Reading and writing to Excel 2007 or Excel 2010 from C# - Part V: Full source for reading
[Note: See the series index for a list of all parts in this series.]
A few people have battled with getting all the bits of code scattered in the series together to actually work. This is not only due to the fact they are scattered, but part III for example was not showing the code correctly and there was a bug in part IV. I have gone back and fixed those issues and to help further here is the full code in one big view (click read more if needed to see it).
using System;
using System.Collections.Generic;
using System.IO;
using System.IO.Packaging;
using System.Linq;
using System.Xml;
using System.Xml.Linq;

namespace ReadFromExcel
{
    class Program
    {
        static void Main(string[] args)
        {
            List<Cell> parsedCells = new List<Cell>();
            string fileName = @"C:\Users\bbdnet0758\Desktop\Demo.xlsx";
            Package xlsxPackage = Package.Open(fileName, FileMode.Open, FileAccess.ReadWrite);
            try
            {
                PackagePartCollection allParts = xlsxPackage.GetParts();

                PackagePart sharedStringsPart = (from part in allParts
                                                 where part.ContentType.Equals("application/vnd.openxmlformats-officedocument.spreadsheetml.sharedStrings+xml")
                                                 select part).Single();

                XElement sharedStringsElement = XElement.Load(XmlReader.Create(sharedStringsPart.GetStream()));

                Dictionary<int, string> sharedStrings = new Dictionary<int, string>();
                ParseSharedStrings(sharedStringsElement, sharedStrings);

                XElement worksheetElement = GetWorksheet(1, allParts);

                IEnumerable<XElement> cells = from c in worksheetElement.Descendants(ExcelNamespaces.excelNamespace + "c")
                                              select c;

                foreach (XElement cell in cells)
                {
                    string cellPosition = cell.Attribute("r").Value;
                    int index = IndexOfNumber(cellPosition);
                    string column = cellPosition.Substring(0, index);
                    int row = Convert.ToInt32(cellPosition.Substring(index, cellPosition.Length - index));
                    int valueIndex = Convert.ToInt32(cell.Descendants(ExcelNamespaces.excelNamespace + "v").Single().Value);

                    parsedCells.Add(new Cell(column, row, sharedStrings[valueIndex]));
                }
            }
            finally
            {
                xlsxPackage.Close();
            }

            //From here is additional code not covered in the posts, just to show it works
            foreach (Cell cell in parsedCells)
            {
                Console.WriteLine(cell);
            }
        }

        private static void ParseSharedStrings(XElement SharedStringsElement, Dictionary<int, string> sharedStrings)
        {
            IEnumerable<XElement> sharedStringsElements = from s in SharedStringsElement.Descendants(ExcelNamespaces.excelNamespace + "t")
                                                          select s;

            int Counter = 0;
            foreach (XElement sharedString in sharedStringsElements)
            {
                sharedStrings.Add(Counter, sharedString.Value);
                Counter++;
            }
        }

        private static XElement GetWorksheet(int worksheetID, PackagePartCollection allParts)
        {
            PackagePart worksheetPart = (from part in allParts
                                         where part.Uri.OriginalString.Equals(String.Format("/xl/worksheets/sheet{0}.xml", worksheetID))
                                         select part).Single();

            return XElement.Load(XmlReader.Create(worksheetPart.GetStream()));
        }

        private static int IndexOfNumber(string value)
        {
            for (int counter = 0; counter < value.Length; counter++)
            {
                if (char.IsNumber(value[counter]))
                {
                    return counter;
                }
            }

            return 0;
        }
    }

    internal static class ExcelNamespaces
    {
        internal static XNamespace excelNamespace = XNamespace.Get("http://schemas.openxmlformats.org/spreadsheetml/2006/main");
        internal static XNamespace excelRelationshipsNamepace = XNamespace.Get("http://schemas.openxmlformats.org/officeDocument/2006/relationships");
    }

    public class Cell
    {
        public Cell(string column, int row, string data)
        {
            this.Column = column;
            this.Row = row;
            this.Data = data;
        }

        public override string ToString()
        {
            return string.Format("{0}:{1} - {2}", Row, Column, Data);
        }

        public string Column { get; set; }
        public int Row { get; set; }
        public string Data { get; set; }
    }
}
Reading and Writing to Excel 2007 or Excel 2010 from C# - Series Index
Free Visual Studio and TFS training?
 S.A. Architect will be offering FREE training covering Visual Studio and TFS in both 2008 and 2010 versions! This will be done in real life, so you will need to travel to somewhere in Johannesburg and so to figure out where, all you need to is click Yes on the S.A. Architect home page. Once some numbers have been worked out a venue can be found and it can be arranged!
The only catch is you will need to give up a Saturday for this, and myself and fellow Team System MVP, Zayd Kara, will be there to help or annoy you ;)
DevRally - From fluid idea to reality!
DevRally is an event which has been bubbling in my head, and the heads of many others for a while, most importantly Willie Roberts. The idea of this event is that developer focused event which is not run by a vendor, so that open discussion between developers who would never meet about technology can come about. It is also not centralised – it is distributed using conference technologies so that the best speakers can be brought easily (and cheaply) to the audience.
A while back myself and Willie decided to see if we could pull off arranging it and, as usual for this sort of idea, the first thing we did was put up a website and a survey to see what would interest people. Yesterday marked the second step in the process: Sponsors! Both BB&D and Mr. Price have come on board with venues and infrastructure help for the event! Still need a few more sponsors and we need to nail down the dates, speakers and so on – but what this space this event should be a great deal of fun!
DevDays coming to your town soon!
 DevDays, one of the premier Microsoft software developer is starting this month with events in Johannesburg and Cape Town and will be in Durban next month! Not only does it have great local guys presenting but Bart de Smet and Brian Keller will be there too!
Most importantly I will be there, just admit it you want to see me more than Bart and Brian ;), and will have prizes and giveaways at the BB&D stand!
To see the session list head over to: http://www.microsoft.com/southafrica/devdays/sessions.mspx and once you are sold signup at: https://secure.mseventssa.co.za/DevDays/Landing.aspx
MVP Summit 2010, Sightseeing - Part 3 (Warning Photo Heavy)
[The series index can be found here.]
Considering Zayd Kara, Rudi Grobler, and I were in Seattle we took a few days extra to sightsee around the town and so here is some of the highlights from the camera:
First thing we did was find the Needle – since it was the only thing Rudi wanted to see.
The entrance to the Microsoft Visitors Centre – worth a look at the cool tech. Not enough Visual Studio in there though ;)
A entire store devoted to Lego was almost too much for me! You could even buy individual bricks based on type and colour for specific products.
At the Sci-Fi Museum and Hall of Fame (SFM), I geeked out A LOT (ask Rudi about my running tour of the place). R2-D2 was cool.
Still at SFM the flying cop car from Blade Runner!
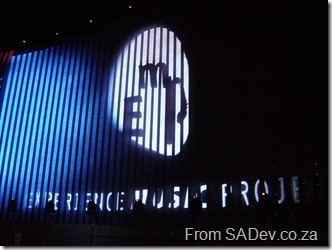
Right next to SFM was EMP – Experience Music Project. This is the HUGE concert screen in the lobby.
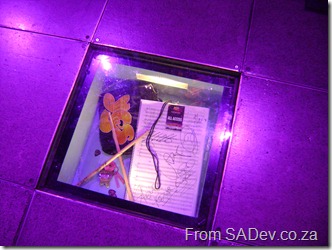
The Yes time capsule at EMP.
Rudi Grobler, Zayd Kara, and myself in our “band” at EPM!
The Eagle artwork at the SAM (Seattle Art Museum) Olympic Park.
MVP Summit 2010, Shiny - Part 2
[The series index can be found here.]
As with any conference event you can expect to fill you bag with trinkets to bring home. You know the stuff which is interesting but basically you would never pay for it yourself and Summit had some of that, but that Visual Studio jacket I got I would’ve paid for :) However this is not about those things, this is about two VERY special shiny things I got to bring home.
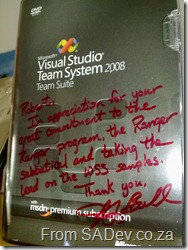
Towards the end of last year I was awarded VSTS Rangers Champion award however at Summit I got my “trophy” – it’s a Visual Studio 2008 Team System box, personally signed with a message from Jeff Beehler!
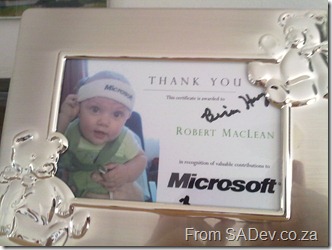
The second special item was a big surprise in that internally in the Team System MVP’s there is an award for the best MVP (think of being called the Tom Cruise of Top Gun), which Ed Blankenship deservedly won! Not to be outdone, I won the MVP in Residence award for spending a ridiculous amount of time away from home and doing stuff for Microsoft. The trophy for this was a photo frame with a certificate signed by Brian Harry!
MVP Summit 2010, Welcome MVP's - Part 1
[The series index can be found here.]
The welcome banner goes up at MVP summit!
“Remember this is NDA, no talking about it, posting on the internet, tweeting or sharing in any way” – That message I think is the MVP Summit slogan because it was told to attendees so many times, and for good reason. MVP Summit, for those who do not know, is an invite only conference which Microsoft runs yearly at their head office in Redmond, Washington (near Seattle). The conference attendees are made up of Microsoft staff, MVP awardees, and regional directors which means that the depth of knowledge is massive. I was comparing it to TechEd, except every session is interactive and starts at least at level 300 (Advanced) and most of the audience has the knowledge that they could present it too. I cannot go into the details of the sessions because of the NDA’s but what I can say is that all the sessions were direct, open and honest communication between MVP’s and the product teams.
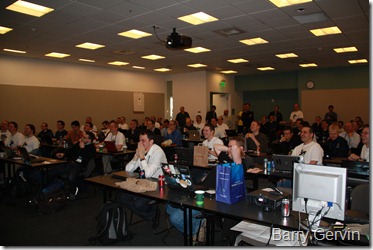
This is what a session looks like at MVP summit. Plenty of MVP’s in front and product team towards the back.
Stepping back for a second let me explain how I got there: Travelling with fellow MVP’s (and co-workers, yip BB&D has 3 MVP’s) Rudi Grobler and Zayd Kara we left Johannesburg to go to Atlanta (15 hours) and what should’ve been a 1 hour stop in Atlanta – which turned into 5 hours, thanks to Zayd’s bag losing it’s boarding pass meaning we missed the flight (admittedly it would’ve been a heroic run to catch it, but that sealed it). Unfortunately Rudi couldn’t get a seat on the next flight and he ended up in Atlanta for 8 hours! We (me and Zayd) touched down in Seattle very late, raced to the hotel and then raced to our first dinner.
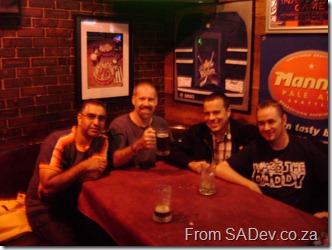
Why are South Africans always the last people at the pub?
Summit would be tiring enough between jet lag, getting up early to eat, catch the shuttle to Microsoft campus, spend your day trying to have your brain not explode and catching the shuttles back – but being the limited time there meant using evenings too for special dinners. So I had dinners with MEA MVP’s, product teams, and general all the MVP’s where plenty of networking and side discussions happen.
Ruari, our fearless MVP lead, giving me the evil eye for disturbing his pool skills (which still didn’t help us win) at one of the dinners.
What I take away from MVP Summit is two fold
- Relationships – meeting people you know by email, meeting new people and catching up with old friends.
- Guidance – A lot of content is focused on the why rather than the how, this means that I better understand Microsoft and that helps me put myself in a better position at work and in the community.
It really is in the interest of companies to send their employee’s who are MVP’s to the summit (put in conditions to safe guard them from leaving if you are worried about that), because what they bring back, even if they can’t tell you, will help you in the long run.
MVP Summit 2010 - Series Index
This is the series index for my posts on MVP Summit 2010. Item’s will light up when they become available, so check back soon.
Rangers Sabbatical, part 6 - What's Next?
For more in this series, please visit the series index.
 Three weeks away from my family, 32900km in distance travelled, thousands of lines of code written, and hundreds of pictures taken what is the outcome of all of this and what do I do next?
Rangers
One of the activities I took part in during my time in Seattle was a code review session of the work I had done. The outcome of that was a list of cleanup and fixes so I need to get that done, which means my weekends and evenings are not free. I also have documentation to do, part of that will be a blog series on the adapters and and another aspect will be a more formal lab guide so people can set it up.
Moving further from the integration project, the Rangers projects do not stop, in fact this is my forth one to date (and the biggest one I have done)! So I am sure when this moves from active development to a more maintenance cycle I will get involved in some other aspect of the Rangers work. I’m hoping that future projects involve testing TFS from the beaches in Hawaii ;)
 MVP Summit
I mentioned in my last post that I will be fixing the lack of sightseeing in Seattle soon – well that will be happening from the 15th Feb! I will be back in Seattle for MVP Summit. This is a private Microsoft conference for people who have won the MVP award and is going to be packed with information, up close and personal time with the product team, and plenty of parties!
I am not going alone, this time I take with me Zayd Kara and Rudi Grobler (both of whom are MVP’s and both work with me at BB&D), so we will spend a few days there after MVP summit to have a look around Seattle! Seattle, you’ve been warning – The South Africans are coming!
For an insight into what summit will be like see the summit teams blog which is filled with info on places to go, sessions to see, what to eat and so on!
Thanks
A final thanks is needed to the people that made this trip happen:
- Willy-Peter – the force behind getting me there, organising everything, taking me snow shoeing, listening to me speaking endlessly on the busses, and opening his family and house up.
- Carola – the force behind Willy-Peter and an amazing hostess. I was treated like royalty while I stayed with them and I loved our chats in the evenings.
- Terry Y. – the unsung hero of these adapters. He works for Microsoft and spent a lot of time debugging issues in the adapters and integration platform with me.
- Charles Sterling – opening up your home, feeding me better than I have ever been fed, and showing me life at Microsoft and America.
- Bill E. – for taking the time out of your schedule to give me guidance!
- Everyone who I met at Microsoft, who most I can’t remember your names because there were so many people, that made me feel very much at home!

