How I Build Presentations, day 6: Dry runs


For the rest in the posts in this series, please see the series index.
 So today the visible changes to the slides are minor—the work really revolves around finishing up the demo script and minor cleanup. Today is maybe the most important day of work for a presentation, as it’s the day I do my first set of dry runs! Dry runs are vital because if you want to be successful, you need to practise, practise, and practise more.
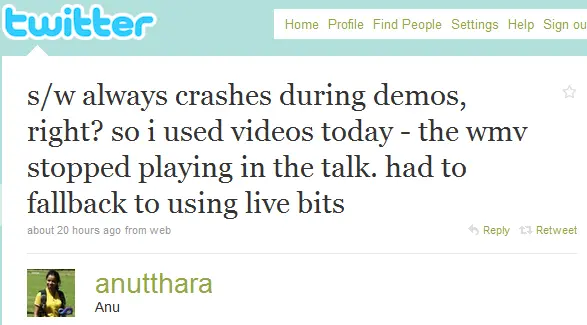
All this practice is part of preventing the dreaded demo crash! Interestingly, the stats on session scores show that demo crashes are one of the biggest causes of low speaker scores, so you want to make sure you do whatever you can to prepare for them. On the right is a tweet that Anu shared about how, no matter how hard you plan to avoid crashes, they can still catch you. Now it may look unprofessional to have a crash, but in Anu’s case, she shows more professionalism because she had a backup—the live bits—so she could continue with her demo.
So what do I do for my preparations to make sure my presentations look good and don’t crash?
Demo bits
If you look at my previous parts in this series, I have fully completed:
- a demo,
- a demo base,
- the parts I need for the demo in an XML file,
- and in the notes of my PowerPoint.
All that is just for the code for my demo, so I am covered for a lot of the issues that can go wrong.
Backups
Backups are important, so all my slides and demos are backed up to “the cloud,” so that even if I have a serious hardware failure, I can pull the bits down and get up and running quickly.
Connections
A lot of demos are prepared by sitting at a desk somewhere, normally connected to the internet with a specific configuration setup. However, that is seldom where you present them—normally, you present them at an event where you may or may not have:
- internet,
- network (wired or wireless) connectivity,
- or even power.
Why is that important? Because a change of environment can mean a settings change that crashes demos.
Two examples of this are power and networks. Power is interesting for laptops since performance could be affected if the OS detects there is no power—so your demos or videos may run slower than expected. In fact, for my demos, I changed the upper limit from 100 000 to 10 000, as it runs too slowly when not on power.
Network connectivity is also something to check, because if you are using a virtual machine, not having network connections could mean the network on the VM is disconnected, and then you cannot connect to the services running on it.
The tip here is: Check that your demos still work when you’re not at your desk.
Projectors
Projectors are very different from a monitor, and doing a demo on them is much different than when looking at your monitor. The key differences I want to highlight are resolution, contrast, screen mode, and layout.
Resolution
Projectors often come out of the Stone Age, as getting above a resolution of 1024×768 is very very difficult. For me, this has been a problem in the past when it came to Visual Studio. With all its toolbars and chrome, the code area is so small at that resolution it made it hard to demo. Knowing this earlier means making sure you get your configuration right—so your demo will work better.
Tip: Alt+Shift+Enter will full-screen your code or designer window in Visual Studio—very useful to get the gunk out of the way. If you are using VS2010, you can also undock and maximize the window.
Contrast
One of the worst demos at TechEd ever—unfortunately, it was mine. I had a great demo planned—a beautiful application styled in a white, grey, and blue theme. When projected to a movie-sized screen at TechEd, though, the projector was not able to get enough difference between the colors. So the application just looked like a big white screen with shadows. What I had failed to do was test that demo on a projector ahead of time. Otherwise, I would have seen the issue and been able to fix it.
Screen Mode
When you are doing a demo at your desk, you can see the screen and have control over it—when using a projector, you are either in duplication mode, which gives you the same feeling, or in extended mode, where you have to juggle between the projector and your machine.
I once forgot to print my notes (yes, I keep a printed copy of my slides and notes, so that I have yet another fallback) before a dry run with some people. Being still new with the presentation, I hadn’t memorized the demos, which meant I needed to read my demo script on my screen and have my demo on another one. This meant connecting to the projector in extended mode. Well, it was a nightmare—I struggled with the difference in resolutions, pop-ups occurring on the wrong screen, and neck pain from having to look back and forth the whole time.
So when possible, run in duplication mode and make sure your demos work well then too.
Layout
Once again, when you are in front of your screen and about 30cm away, you can see everything easily. However, when you are looking at it projected 15m away with 20 people in front of you—where things are on the actual screen becomes important. Easy tips are to avoid:
- the very bottom (it will likely be hidden by heads),
- the far left and right (as some projectors/screens may cut off those portions of the screen).
Once again, testing with a real projector helps with this scenario.
Tip: I have also started using 16:9 aspect ratio for my slide decks over the traditional 4:3 aspect ratio. This helps the layout because when a slide deck with a 16:9 aspect ratio is projected by a projector with a 4:3 aspect ratio (which most projectors are), the bottom is banded out. This is the same as when you watch a wide-screen movie on a normal TV—those blank bands at the top and bottom are added to compensate. That automatically handles making sure you don’t put things too low on the physical screen.
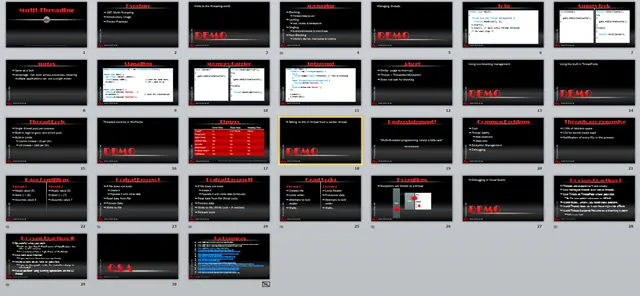
Slide deck at the end of day 6