I’ve been presenting up a storm recently—mostly because I’ve been on a presentation skills course😉 where I learnt a lot about the soft skills needed to be a better presenter. For that course, I had to present with slides on something I knew about, so I chose LINQ.
After all that was done, I’ve been presenting on the joys of jQuery recently. Instead of boring the audience with slides and constant switching to demos, I decided to build a presentation system in jQuery that handled both slides and demos. You can view it below. A few notes:
To move to the next slide, click the globes at the top or press =.
Pressing - will take you back a slide.
You can also press the print button in the top section for a single-page print view (i.e., stripped of colors and with my slide notes).
What’s great is that the entire thing is a single HTML page, and the slideshow system is about 100 lines of JavaScript.If the embed does not load, you can open the presentation directly.
[Note: See the series index for a list of all parts in this series.]
Over the past week, I have been learning about the complexity of working with the Excel 2007 native file format—XLSX, or, as it is correctly known, SpreadsheetML. There are three ways to work with it: firstly, build your own parser (just too much work for me), or second, use the OpenXML SDK that Microsoft provides. The current version, at the time of writing—version 1—of the SDK is not great: there is very little, if any, benefit to using it over the third method. There is a V2 SDK currently in beta, which looks brilliant, and frankly, when released, would be the recommended route.
The third way—which is the way I chose—is to use the new features introduced in the .NET Framework 3.0.
What is a XLSX file? A XLSX file is actually just a ZIP file, containing a number ])/XML files.
This means all you need to do is open the XLSX file as a ZIP file, extract the correct XML files (or parts, as they are referred to), and parse them.
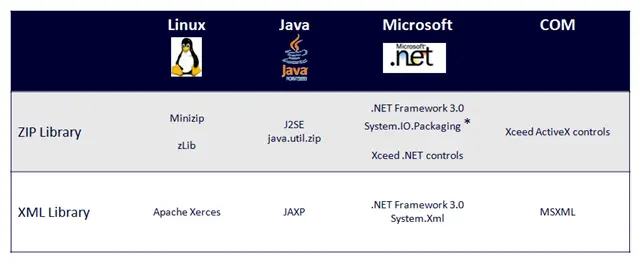
If you are thinking this is a .NET-only solution, the chart below is from Doug Mahugh, showing a number of ways across different technologies and operating systems to achieve the s])/ thing. This series will])/cus on the .NET approach.
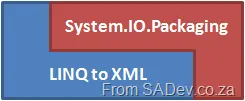
What is nice about using System.IO.Packaging to read the file over direct ZIP options is ])/t there are some helper m])/ods to make working with any of the new formats (DOCX, XLSX, etc.) easier.
If you are attending Dev4Devs on Saturday (or are here after the event) and you are looking for a copy of the slides and code, you can get them below!
Code
The code here is also different from what I presented in the following ways:
There is a timer control in it—so if you add items to the DB while on the site, it updates and shows those changes within 5 seconds.
The layout is slightly bigger (bigger header) and has buttons (to make it look like an email client)—these were removed because it doesn’t work at 1024×768 (the projector resolution). So they’re back in their graphical beauty.
There is a feed button that links to an ATOM feed for the last 10 emails—something I mentioned you could do, well now you can see it.
There is a database creation script, but no data. You need to create your own data.
jQuery is fairly easy to use if you understand CSS or have been working with HTML for a while, but what if you are a drag-and-drop developer? Who never has done that? Or if you want to whip up a nice effect quickly? Well, the guys from Microsoft have recently launched Glimmer, which is a free jQuery effects IDE.
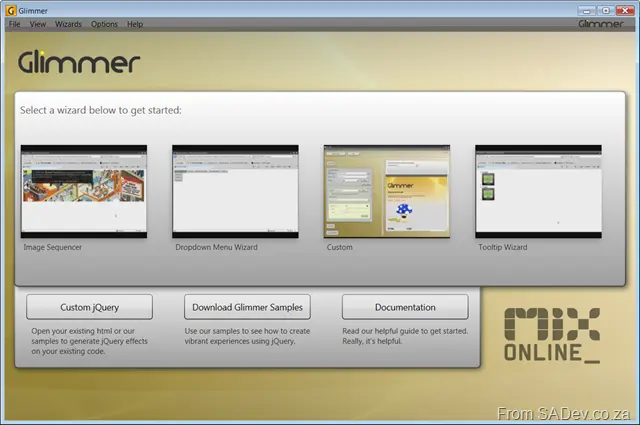
When you launch the very good-looking WPF application (read: SLOW), you get four templates, three of which have a wizard interface to set them up.
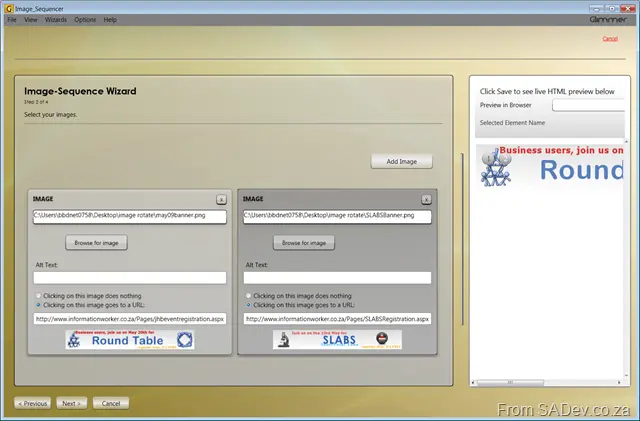
Image Sequencer ([click here for the demo of this effect](/files/glimmerpostsamples/image rotate/sequence.html)): This creates a rotating image box. Think of use for banners where you want to have each image link to a different URL or for a picture rotate/slide show. This one has four steps:
Description (where the “Do not show this again” checkbox lives)
Select the images and set the URL for them . What’s nice here is the live preview window on the right-hand side.
Set how long to delay between images and what the image size should be (e.g., if you need to resize)
Lastly, the save page. The UI is a little odd here, since there’s no finish button. You need to use the (large) save button. When you save, you get a folder with an images subfolder (containing your images), a CSS file, an image for the button (to manually switch between images), jQuery 1.3.2, a minified JS file of the effect you’ve created, and an HTML page for testing/usage.
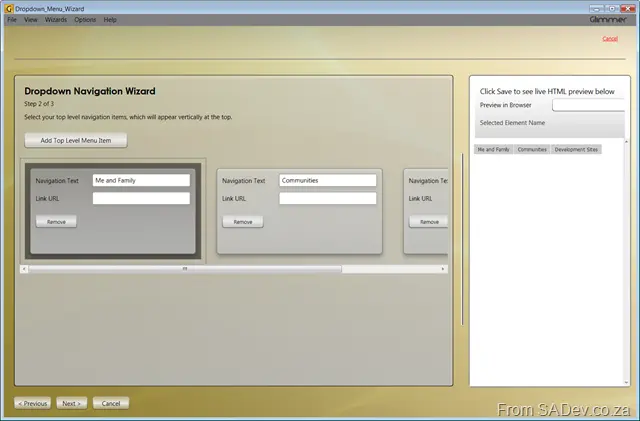
Dropdown Menu Wizard ([click here for the demo of this effect](/files/glimmerpostsamples/image rotate/dropdown.html)): This creates a dropdown menu. It has three steps:
Description (no “Do not show this again” checkbox, by the way)
Set up the top-level menu options
Add second-level options and save. The output is pretty much the same as with the Image Sequencer—a minified JS file of your effect, jQuery, and an HTML page.
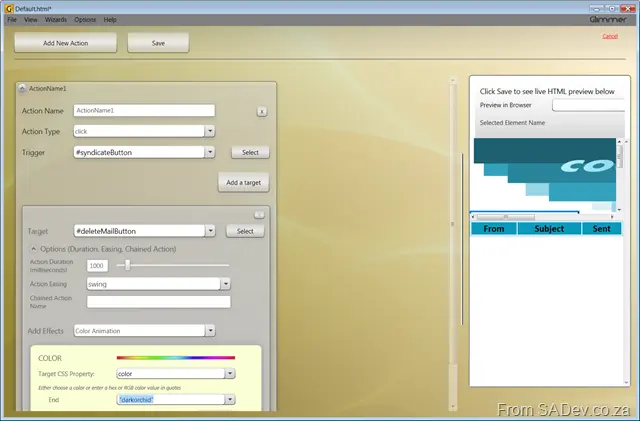
Custom: The non-wizard of the group. This one is powerful and will let you build a lot of effects together, but you need to have an HTML file to start with, as it will give you a list of the tags/IDs available. No page? No tags? Nothing to work with. It gives you a single page to wire up the events, and I think this would be useful for people needing something special.
Tooltip Wizard ([click here for the demo of this effect](/files/glimmerpostsamples/image rotate/tooltip.html)): Two-step wizard to add tooltips to text/images.
Description (again, no “Do not show this again” checkbox)
On step two, you put in the text/image and the tooltip, then save it.
I also like the menu option “Clean Code Mode” (under the options menu), which disables the minification of the code it generates. This will be very useful for people using this to learn from.
Overall, this is a good first drop—although it should be viewed as beta. The performance is terrible, there’s so much more you could do with jQuery that it doesn’t cover, it’s unaware of plugins (which is important for jQuery), and the UI has many things that aren’t logical (e.g., there’s no hint that the Custom option needs an HTML page to actually do anything). However, as a tool to train people or give designers a way to work with jQuery, this will be very valuable, and I’ll be demoing it at my jQuery talk.
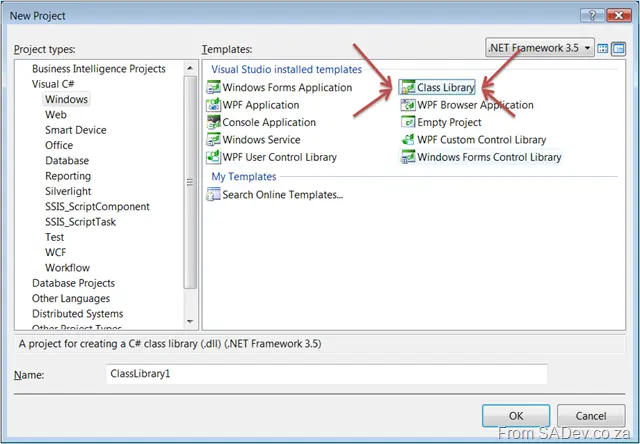
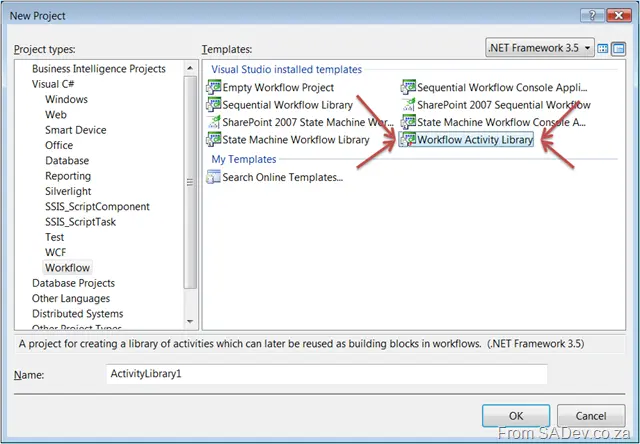
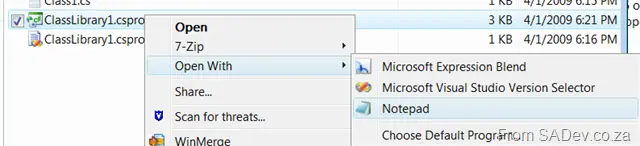
If you are working in a Workflow Foundation project, you may find that you have created a class library (see image below) and want to add workflow activities to it—but you may encounter issues because you didn’t create a Workflow activity library.
Issues
Some of the issues you may encounter include:
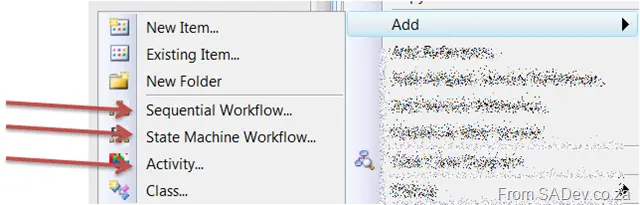
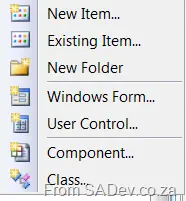
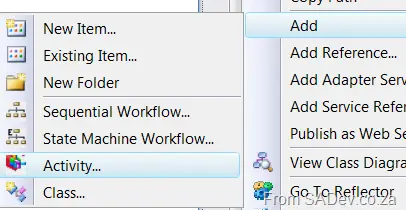
The Add Item menu lacking expected options.
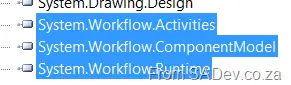
The Workflow Designer interface not functioning as expected.
vs.
Solution
To resolve this, you’ll need to modify the class library project file with slight adjustments. Open the file in a text editor like Notepad, or use Visual Studio to unload and edit it.
First, add a <ProjectTypeGuids> node to the base <PropertyGroup> node. To do this:
Navigate to the <PropertyGroup> node—under the <Project> node and without any <Condition> attributes. (On my machine, this is on line 3.)
Trumpi asked the question What makes a senior developer? So I started to write a comment on it, and it ended up a little big for a comment, so I thought a blog post would be better.
Warning: This post is full of generalizations and is based on my narrow-sighted view of the world.
Before I answer the title question, I want to take a stab at a point in Trumpi’s post: why are they tossing so many “senior” devs’ CVs away? Arne commented on it and said it’s because developers want the high life quicker (easier?) now. I disagree with Arne—because I think it’s the companies that hire these junior/intermediate developers and push them into higher positions out of necessity (i.e., the company lacks seniors, so they promote intermediates or juniors to fill the gap). Then, they assume that because they’re a senior in Company X, they should be a senior elsewhere. I’ve seen this a lot in the “newer” development companies; the more established ones seem to avoid this issue.
Not to say that I haven’t met developers who want the high life quickly—however, this seems to stem from an educational background. Developers who are self-trained, attend training colleges, or study at tech schools don’t seem to be so driven by the fast lane. The higher the education (honor students, in particular), the more likely they are to be affected by the “high life quickly” syndrome.
To the question at hand: What makes a senior developer? That’s a tough question because it’s more about the environment and culture of the company than the person themselves. If your culture is more formal (suit and tie), seniority could be based more on qualifications; in a more informal environment, it might rely more on experience. There is no wrong or right here.
My view of a senior is someone who meets five key criteria: Knowledge, Proven, Sharing, Passionate, and Humility.
Knowledge: Has deep knowledge of a technology or technologies (how it was obtained is irrelevant to me).
Proven: Has paid their “school fees”—meaning they’ve done real (hard) work to prove they deserve to be called senior.
Sharing: Is able to share knowledge. This is important because a senior who can’t share knowledge isn’t worth it. Now, there’s the issue of personality—some developers just don’t have one. I’m not saying seniors need to be great speakers like Scott Hanselman or salespeople. If they’re introverted and can only share with people they know at work, that’s just as valid as being a great speaker or blogger.
Passionate: They must be passionate. As a senior, being called a geek or nerd is a badge of honor that should be embraced.
Humility: Lastly, and most importantly, all of those traits should culminate in a senior admitting, “I don’t know everything… but I’m willing to learn.”
The senior developers I’ve worked with have come from incredibly varied backgrounds and are on many different paths—but they all meet these five criteria.
Working on a project that uses ADO.NET Data Services for a small part of it. I put the ADO.NET Data Services portion together (add the files, put the EF data model together, link it up, etc.) on my machine (Windows Server 2008, SQL Server 2008, VS 2008), and it all worked great! Checked it into source control and then went about doing something else, ignorant of the coming problem.
Then the developer who would actually consume it (we’re consuming it in C# using LINQ) came to me saying that nothing worked. 😢 All we get is the generic ADO.NET Data Services error: “An error occurred while processing this request.” We removed the where clauses, and everything worked perfectly, which hinted that the LINQ/EF expression tree was borking out somewhere. So we went to the EF data model, told it to update, and it made a change under the surface—everything worked again?!
I love TFS because it allowed me to compare my version and the updated one easily, and there was one tiny change (literally 1 byte!) in the .edmx file (not the .cs backing file, the .edmx file itself). Turns out that in dev, they’re using SQL Server 2005, and I built the model with SQL Server 2008—now note there are zero 2008-specific features in use—but it seems the EF expression tree doesn’t care and tries to use some SQL 2008 magic because it thinks it’s SQL Server 2008. This is controlled by the ProviderManifestToken attribute! Changing that to 2005 (which the update did automatically for me) solved the problem!
Andreas Grabner has posted a brilliant article on performance effects of working with the SharePoint object model. He covers which methods you should use over others (like SPContext.Current.List.Items.Count being much slower than SPContext.Current.List.ItemCount), structuring the code, and backs it up with performance stats and details on how to do your own.
I’d say it’s a must-read for all SharePoint developers.
WF has two types of activities you can create: the easy one and the hard one. That’s not really their names (though it would be cool)—the first (easy) is a composite activity. This is the one that Visual Studio lets you create, and in effect, it’s just another sequential workflow that you build up and reuse.
However, when you use them, they look like sequence activities. If you want something that looks like a “real” (read: what you get out of the box) activity, you’ll need to create the hard one—which is simply called an activity (so clear a name, ain’t it). The smallest this can be is one class, and the biggest it can be is five classes, all with basically the same structure. So it’s weird there’s no easy way to build these—say, with a template. Well, I’ve created one that sets up the base for an activity and lets you get going as quickly as possible.
Usage
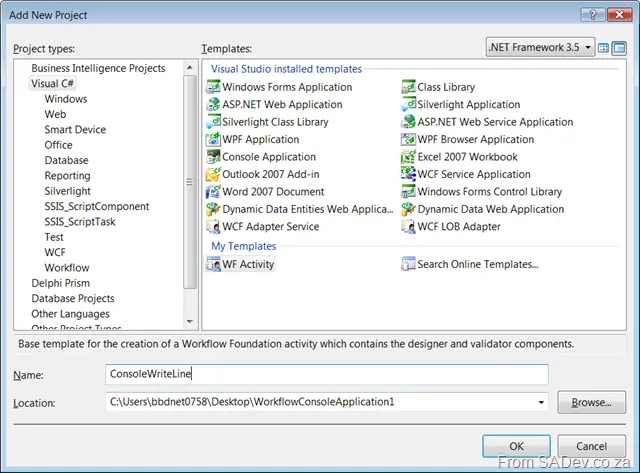
To use it, select File → New Project, and under Visual C#, My Templates will include the template called WF Activity. Some things to note from that little sentence:
You need Visual Studio 2008 (yeah, that wasn’t clear, but I needed to sneak it in somewhere).
It’s C# only.
It creates a project for your new activity for ease of packaging purposes.
And for some reason, if I put a space in the name, it crashes my Visual Studio—so, um, that could just be me.
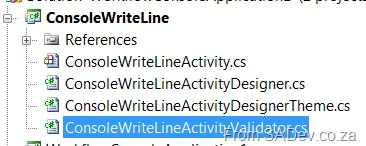
When you create it, it generates four files, all starting with the name you choose (which will also be the name for your activity, so I don’t suggest putting Activity in it). For example, mine was called ConsoleWriteLine, so my files are:
ConsoleWriteLineActivity.cs
ConsoleWriteLineActivityDesigner.cs
ConsoleWriteLineActivityDesignerTheme.cs
ConsoleWriteLineActivityValidator.cs
Special Features
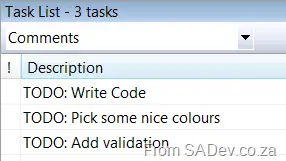
I’ll come back to what they do, but I wanted to point out that I’ve taken special care with the code so that if you run code analysis (FxCop), it reports no issues—except for the project not being signed and COM visibility stuff. StyleCop also reports no issues. I’ve also added three TODOs (if you use the VS task list):
The first one (Write Code) takes you to the Execute method in the {Project}Activity.cs file. This is what runs when your activity executes.
The second one (Pick some nice colors) takes you to {Project}ActivityDesignerTheme.cs, where you can specify the start and end colors for the gradient. By default, it’s dark to light blue.
The third one (Add validation) takes you to the Validate method in {Project}ActivityValidator.cs, where you can add any design-time validation you need. It even includes a sample of how to add a validation failure message.
What do I need to add to use it?
Basically, all you need to do to get started is:
Add the properties you need to the {Project}Activity.cs file.
Add the code as indicated by the task item.
Compile and use.
Optionally, you can:
Change the colors
Add validation
Add an icon
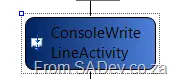
Change what’s shown on the component
The text display is controlled via the SetText method in {Project}ActivityDesigner.cs and has been wired up to respond to property changes. So you can have the text update dynamically if the properties change with minimal code.
How do I deploy it?
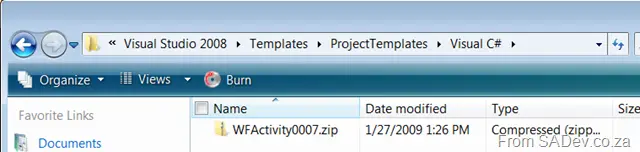
To use it, simply dump the ZIP file in: Visual Studio 2008 > Templates > ProjectTemplates > Visual C# in your Documents folder, then restart Visual Studio!
Note: My hosting provider corrupts ZIP files, so it’s uploaded in 7-Zip format—you’ll need to extract it.
Hopefully, you get some productivity benefit from this component or it helps you learn how to write your own. And if it does, please leave a comment so I know (and get that warm fuzzy feeling I like so much).