It is amazing how much can change in 3 minutes—this was the learning from the 1st day of MVP Summit 2011. I arrived in Seattle with Rudi Grobler for MVP Summit after 23 hours of travelling, which is frankly just ridiculous.

During that time, I did a lot of thinking and reading (thank god for my Kindle), but shortly after arriving in a VERY cold Seattle, I had my first 3-minute mind change. I walked out of the lovely SEATAC airport and saw snow! I got like a kid with snow, but within 3 minutes, the cold was just too much and the appeal of the snow wore off 😊
One of the things we did was head to the awesome Microsoft Store—this place is just fantastic. They have so much in there, but so little feels like a store. It really feels like a place to go and experiment and play with Microsoft tech: there are Kinect stations, Microsoft Surfaces, tablets & laptops running Windows 7, and a variety of Windows Phone 7 devices.
 25022011482 by Robert MacLean, on Flickr
The 3-minute lesson here is from the store people—having super friendly and knowledgeable staff really means that it is so much better and easier to buy there. I hope that this fantastic learning in the consumer space is the start of something more at Microsoft.
Finally, we hit a place called The Parlor for some beer & pool and ran into a Microsoft Team (WinSE—suspect is second edition, since they had a service pack 1 disk "SE" = Sustained Engineering), just guessing, but I think it was their ship party.
 25022011492 by Robert MacLean, on Flickr
  25022011493 by Robert MacLean, on Flickr
After some pool—where Rudi kicked my ass until another friend, Rein Hillman, arrived (which is when I fought back fantastically)—we left, and I had my final 3-minute lesson: walking with your hands in your pockets (because it is cold) means you need to use something else to stop your fall, and your face doesn’t work well.
 26022011497 by Robert MacLean, on Flickr
Update: Thanks to Chris Johnson for telling me what SE meant.
 My old Logitech V450 mouse had an odd issue: if Windows was put to sleep and I pulled the dongle out, Windows woke up. This never bothered me much since I got into the habit of doing that before putting Windows to bed.
However, with my new Performance MX Mouse (aka the mouse Batman would use), it does something similar—but a change of habit can’t fix it.
The new mouse has a tiny dongle designed to be left in all the time, and I do that. However, any mouse movement or button press wakes up a sleeping Windows. So if I forget to turn the mouse off and toss it in my laptop bag, it turns the laptop on and starts converting my laptop bag into an oven.
The solution to both issues is to disable this wake-up feature.
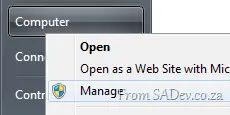
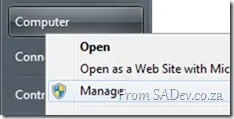
Step 1) Right-click the Computer item in the Start menu (or the My Computer icon on your desktop) and select Manage.
Step 2) Click Device Manager (under System Tools).
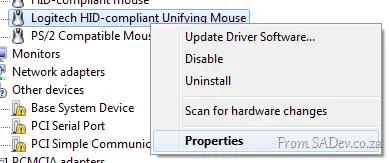
Step 3) Expand Mice and other pointing devices, right-click your mouse, and select Properties.
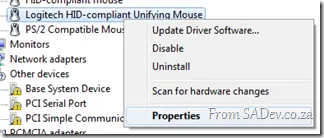
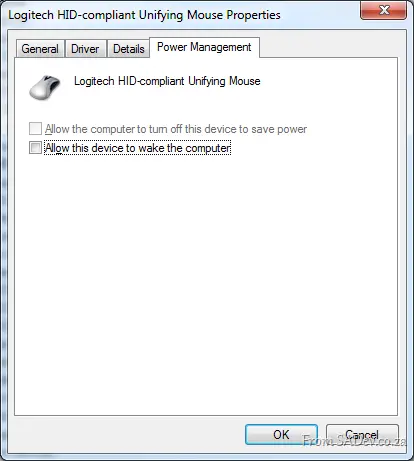
Step 4) Go to the Power Management tab, uncheck Allow this device to wake the computer, and click OK.
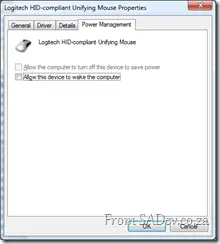
This will prevent both the dongle and mouse actions from waking up your computer.
Footnote: How porn does that last line sound?
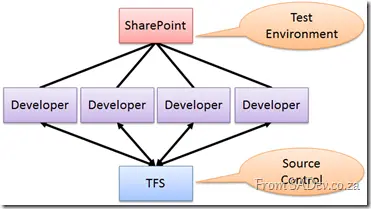
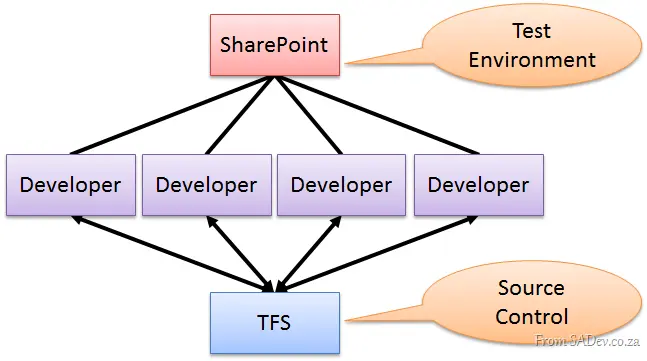
With SharePoint 2010 and Visual Studio 2010, the ability to be a productive developer was key—and there’s tight out-of-the-box integration. This means that SharePoint developers can easily put code into source control. Hilton Giesnow covers this brilliantly in a video he made: http://bit.ly/g71Gnb.
Imagine a number of dedicated SharePoint developers: they might use an enterprise ALM solution like TFS and have SharePoint 2010 Developer and VS2010 installed on their own machines—life is good. But what about the individual or ad-hoc developer?
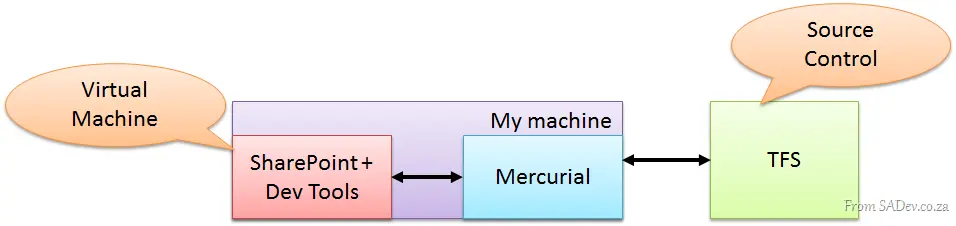
The problem for them is that installing SharePoint 2010 is resource-intensive, and you may not want it running all the time (what Hilton calls "9-to-5 development"). What if you’re switching between projects—how do you switch SharePoint? The solution I found is to use a virtual machine (VM) with SharePoint and dev tools installed, doing all work on the VM. This is great because the overhead is only present when needed, and you can easily switch between different virtual environments. The downside: source code management.
Sure, you can connect the VM to the network and manage code via source control as usual—but this isn’t always easy or possible. Recently, I faced this problem: source control was on one domain, while my development was on another. I chose to use Mercurial, a Distributed Version Control System (DVCS), and I’d like to share my experience with you.
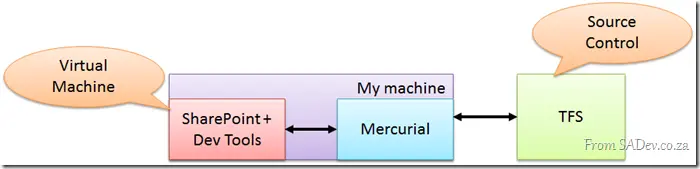
DVCS differs from “traditional” source control like TFS or Subversion, which follows a client/server model. In DVCS, every developer acts as their own server, performing pushes and pulls (like syncs) with other developers.
This setup means you only need lightweight tools alongside SharePoint and dev tools on the VM. At the end of each day, I could run Mercurial on my machine and pull the source code down to my local machine. This way, the VM had the code, and my “real” machine also had it. Then, the code could be easily checked into the corporate source control system—adding another backup and ensuring compliance with source management policies!
This has been an exciting project, and this configuration made source code management smooth and seamless.
I purchased a Logitech Performance MX Mouse](http://www.logitech.com/en-us/mice-pointers/mice/devices/5845) (to replace my other [Logitech V450 mouse), which has a number of fantastic features:
- Dark-field optical sensor that works on everything, including glass
- The awesome and tiny wireless receiver that can remain plugged in all the time
- Ability to charge over USB and still work
- 7 buttons
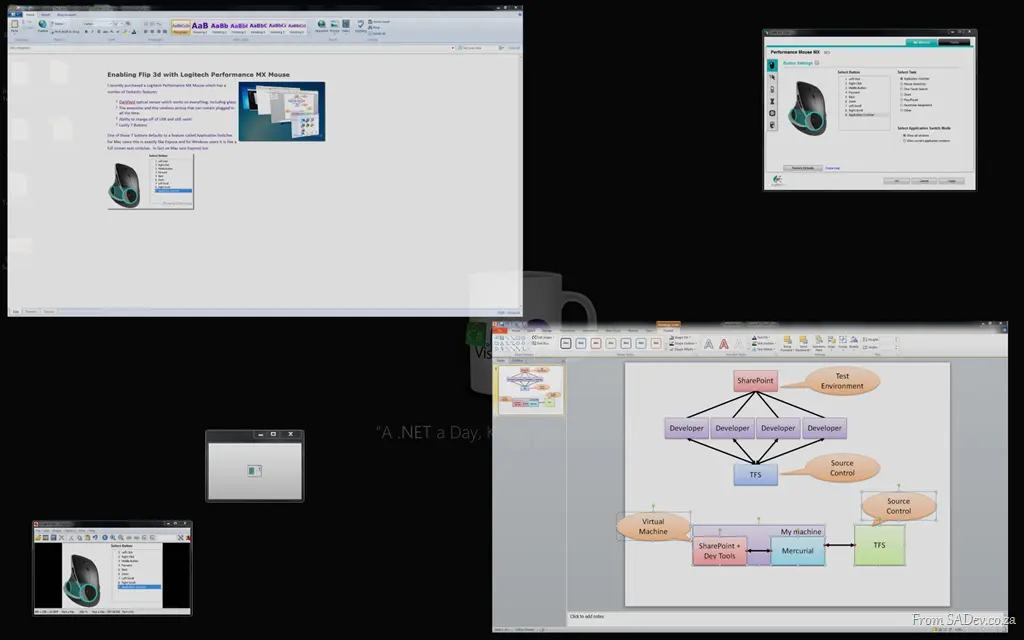
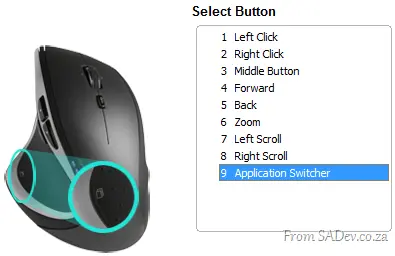
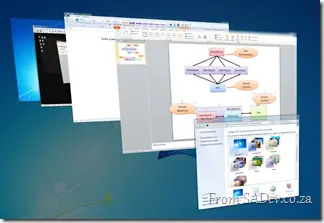
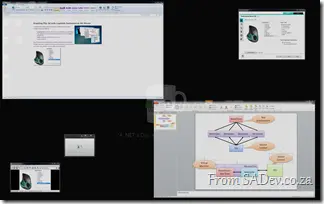 One of those seven buttons defaults to a feature called Application Switcher. For Mac users, this is exactly like Expose, and for Windows users, it’s like a full-screen task switcher.
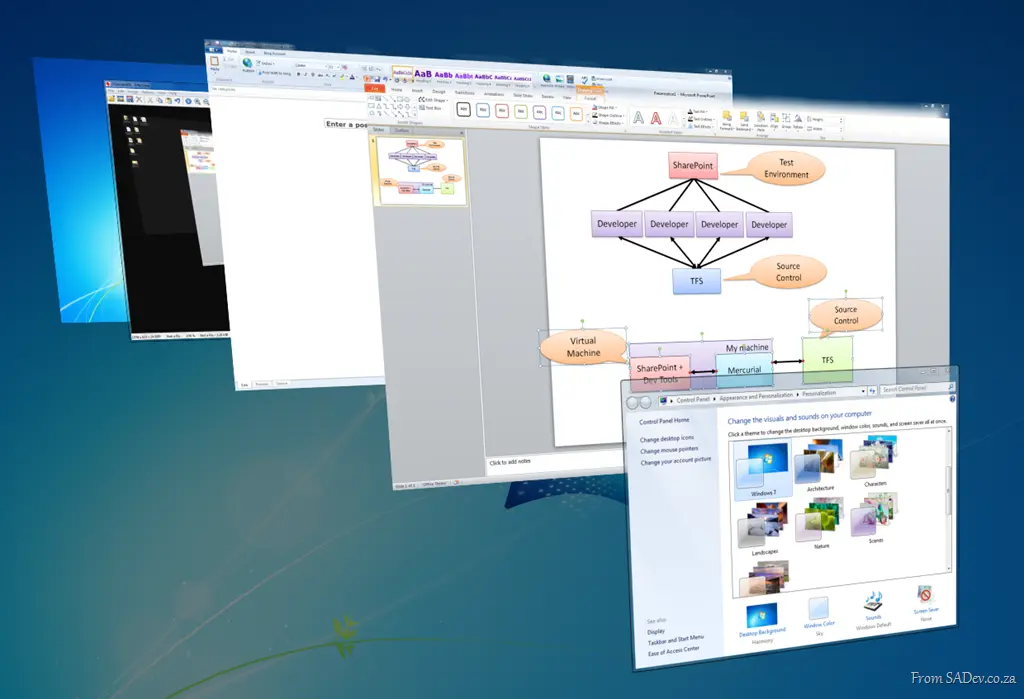
In fact, on Mac it runs Expose, but on Windows this is a custom application—and it really doesn’t have the polish of Flip 3D (the Win+Tab thing) that ships with Windows Vista and Windows 7.
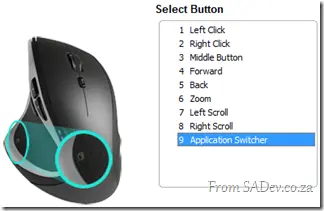 So how do you change this? There are many posts about using macros, assigning specific applications, or even hacked drivers—but from my own experience, this is no longer needed. It appears most people don’t know about it because it’s so well hidden.
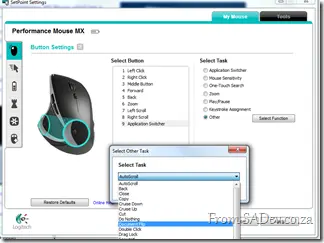 The first step is to download the latest version of SetPoint (the mouse software) from Logitech, which, at the time of writing, is 6.2. However, the mouse ships with version 4.7—a release over three years old! This is odd, since the mouse was launched less than a year ago.
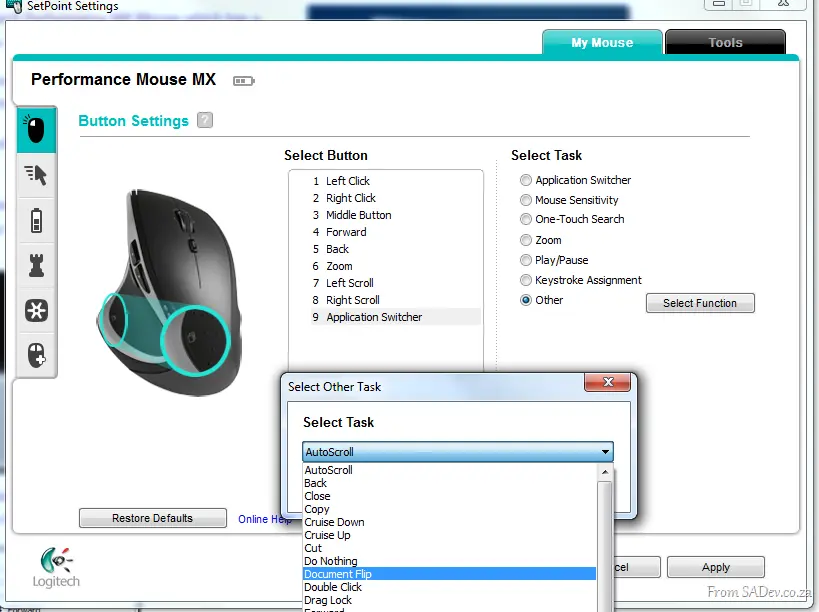
Once you’ve upgraded, go to the Button Settings section, select the button, and set the task to Other. This will bring up a dialog with a massive dropdown full of options. If you look for Flip 3D or an alternative application switcher, you won’t find it—but there’s an option called Document Flip, which (you guessed correctly) is Flip 3D.
Set your mouse to this, and voilà!
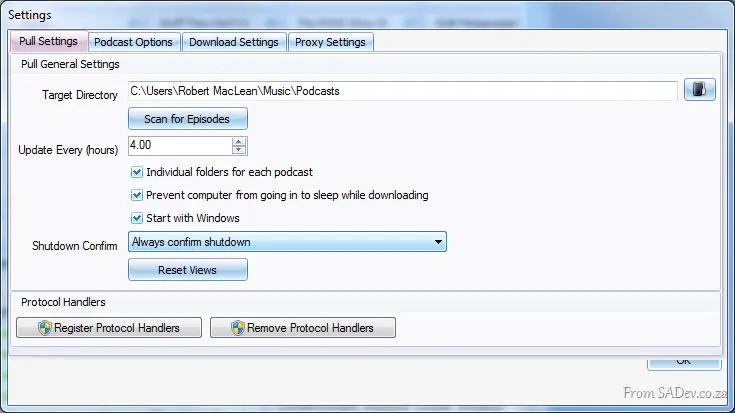
2011 has started off well with the new release of Pull! This release is a major update where the focus was on improving the experience on the front end.
Ribbon
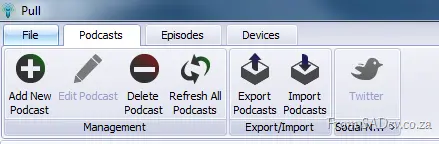
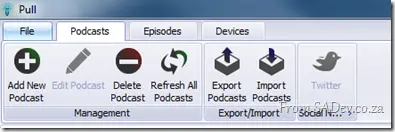 You either love it or you hate the ribbon, but there is no doubt that it makes you more productive—and we’ve moved to that with this release.
There has been discussion about moving the Episodes ribbon around, so this may change. Please join that discussion or post issues if you have other items you’d like to change—see the Issue Tracker.
Cover Flow
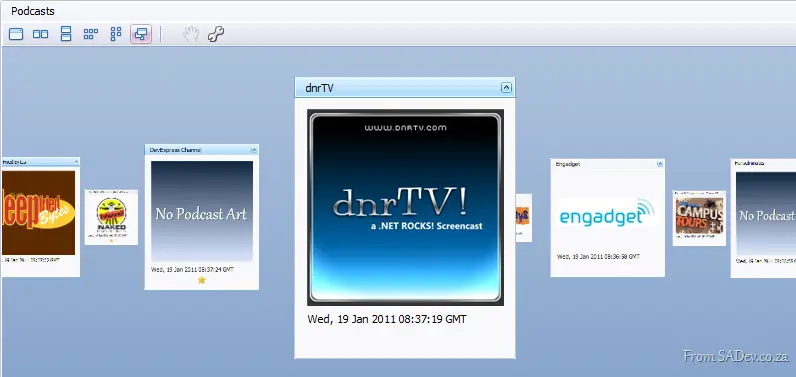
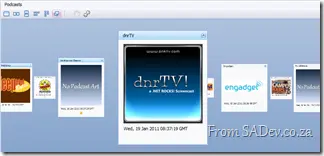 We now show podcasts using cover flow, meaning we now attempt to pull down the podcast art! This makes it much nicer to browse and move around podcasts.
However, maybe you don’t like this—check out the toolbar options:

- Show one podcast at a time
- Stack the podcasts horizontally instead of the cool carousel flow
- Same as 2, but with vertical stacking
- Stack across first, then stack vertically
- Stack vertically first, then horizontally
- Carousel mode (default)
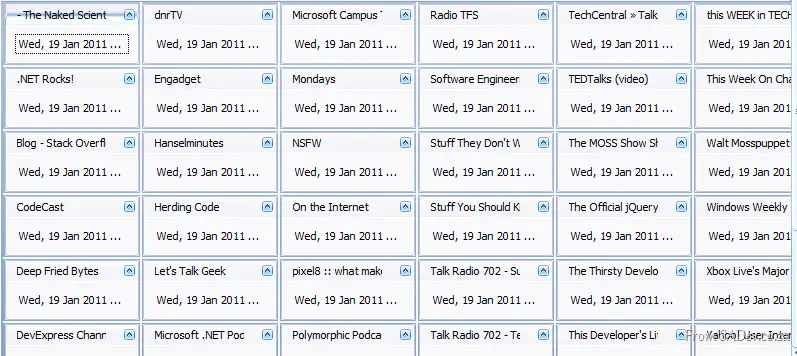
You can also use the wrench to customize the cards and change what is shown—like removing the image and status icon and shrinking the size:
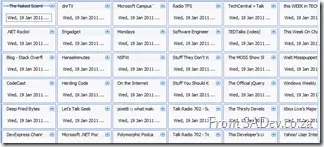
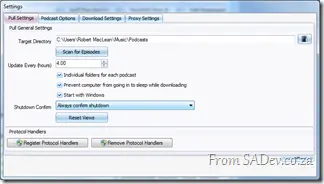
And if you want to revert—you can use the reset views button in the settings.
Powerful Grids
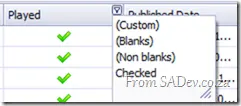 Both the episode and download queue grids have been greatly enhanced.
- Changes now persist!
- You can reorder and resize columns.
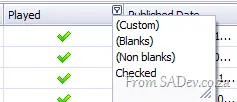
- Full filtering support is included!
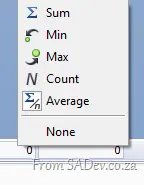
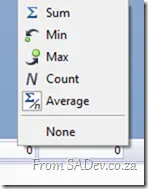
- A total bar appears at the bottom, which you can toggle on/off or customize (try right-clicking).
Twitter
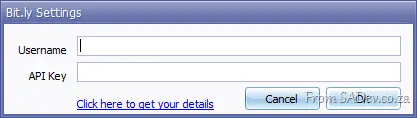
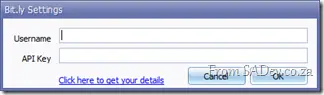
 Twitter support has received a major overhaul, addressing previous issues! One feature you might want to check out: the small arrow below the button, which lets you specify your http://bit.ly username and password.
Export
You can now export to .xlsx (Excel 2007/2010) and .html, in addition to .csv.
Coming up next?
As this is a fairly major release, we want to focus on polish and smaller features for the next update!
[This blog is part of a larger series. To find more parts in the series, please see the Series Index].
The FileSystem class is what originally brought me to explore this assembly because there are some very interesting options in the class that aren’t available elsewhere. To add to the confusion, there are two FileSystem classes in the Microsoft.VisualBasic namespace 😵💫:
- Microsoft.VisualBasic.FileSystem
- Microsoft.VisualBasic.FileIO.FileSystem
The one I am interested in—and this post covers—is the second one, which has some fantastic options. Unfortunately, there are way more functions in it than a single blog post can cover (27 methods, not counting overloads), so I am going to focus on just two of them, which bring new features—i.e., not just wrapping some other .NET API.
DeleteDirectory
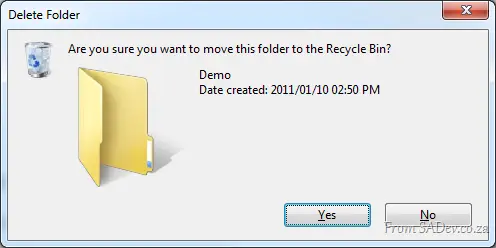 The first I want to look at is the DeleteDirectory method, which allows you to easily delete a directory. What makes this fantastic is that it can empty the directory of files first (i.e., it handles non-empty directories). Second, it supports deleting to the recycle bin, and finally, it supports a nice, pretty UI for the deletion action, including a confirm dialog and progress bar dialog.
string testFolder = FileSystem.CombinePath(Environment.GetFolderPath(Environment.SpecialFolder.Desktop), "Demo");
FileSystem.CreateDirectory(testFolder);
FileSystem.DeleteDirectory(testFolder, UIOption.AllDialogs, RecycleOption.SendToRecycleBin, UICancelOption.ThrowException);
The code above uses a few options from FileSystem:
- CombinePath: This provides an error-checked and normalized concatenated path using
System.IO.Path.Combine. - CreateDirectory: This does some error checking and wraps
System.IO.Directory.CreateDirectory. - DeleteDirectory: This is what we are talking about, with the display of UI and "send to recycle bin" enabled.
There are similar methods to DeleteDirectory, such as MoveDirectory & CopyDirectory, and similar items for files: CopyFile, MoveFile, etc…
FindInFiles
This is a very useful function that allows you to search files on your machine for specific content (i.e., search in the file, not just the filename). This is not wrapping any functionality behind the scenes (for a change):
string myDocs = Environment.GetFolderPath(Environment.SpecialFolder.MyDocuments);
var result = FileSystem.FindInFiles(myDocs, "MVP", true, SearchOption.SearchTopLevelOnly);

MessageBox.Show(result.Aggregate((c, n) => { return c + Environment.NewLine + n; }));
The above code shows me searching the My Documents folder for any file containing the letters MVP (in any case—controlled by the third parameter). It can be filtered using standard wildcards and can search sub-directories too 😊
 [This blog is part of a larger series; to find more parts in the series, please see the Series Index]
The Network class is an interesting set of wrappers around other classes in .NET, which is useful for simplifying certain actions:
- DownloadFile & UploadFile
- Ping
- IsAvailable
DownloadFile & UploadFile
These two methods are interesting in that they wrap the WebClient class, which makes it much easier to use while still giving a lot of flexibility. This isn’t the most robust way to work with HTTP (download) and FTP (upload), but it is very useful. For example, the easiest way to download a file:
Network network = new Network();
network.DownloadFile("http://www.bing.com", @"c:\bing-index.html");
It includes 10 overloads, with the most complex being:

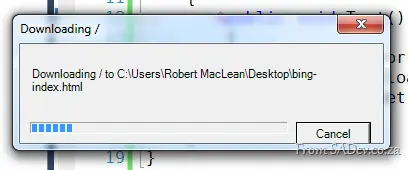
One of the interesting parameters I wanted to highlight is the showUI parameter, which, when set to true, gives you a dialog box with a progress bar and cancel support. It’s not pretty, but—like a lot of this Network class—it is functional:
Ping
Just like DownloadFile & UploadFile, Ping wraps other functions in the framework—namely, the Ping class from System.Net.NetworkInformation. It really just takes two lines of code if you used the Ping class and makes it two lines using the Network class—not really that helpful:
Network network = new Network();
string message = network.Ping("www.bing.com") ? "Bing is up" : "Bing is down";
IsAvailable
The last in the Network trilogy is the IsAvailable property, which tells you if you are connected to a network. All it does is call NetworkInterface.GetIsNetworkAvailable.
Why you’d want to write two lines for this when you could use the one-line alternative is confusing—but it’s there:
Network network = new Network();
string message = network.IsAvailable ? "Network up" : "Network down";
string message2 = NetworkInterface.GetIsNetworkAvailable() ? "Network up" : "Network down";
[This blog is part of a larger series; to find more parts in the series, please see the Series Index]
Hardware isn’t just related to computer information—like OS version and memory—but it also includes a variety of other devices, such as audio, clocks, keyboards, and many more. The Visual Basic library provides access to many of these pieces of hardware:
Audio
Microsoft.VisualBasic.Devices.Audio is an interesting class that allows you to play various sounds. It has three key functions:
- Play – This allows you to play a wave file, either by passing in the filename, a stream, or a byte array. There are several overloads to control how the audio is played.
- Stop – Stop the currently playing audio.
- PlaySystemSound – This plays the sound associated with a specified system event.
string waveFile = @"C:\Windows\winsxs\amd64_microsoft-windows-speech-userexperience_31bf3856ad364e35_6.1.7600.16385_none_77fee1b2657da663\Speech Sleep.wav";
Audio audio = new Audio();
audio.Play(waveFile, Microsoft.VisualBasic.AudioPlayMode.WaitToComplete);
audio.Play(waveFile);
Thread.Sleep(300);
audio.Stop();
audio.PlaySystemSound(System.Media.SystemSounds.Question);
Console.ReadKey();
Clock
Microsoft.VisualBasic.Devices.Clock is rather pointless—it has three properties matching existing ones:
- GmtTime equals DateTime.UtcNow
- LocalTime equals DateTime.Now
- TickCount equals Environment.TickCount
Keyboard
This provides a mix of features. First, there are three Boolean properties for modifier keys (Ctrl, Alt, and Shift), telling you if they’re pressed. Next, there are three more Boolean properties for toggle keys (Caps Lock, Scroll Lock, and Num Lock), indicating if they’re enabled.
Keyboard keyboard = new Keyboard();
Console.WriteLine("Alt pressed: {0}", keyboard.AltKeyDown);
Console.WriteLine("<kbd>Ctrl</kbd> pressed: {0}", keyboard.CtrlKeyDown);
Console.WriteLine("<kbd>Shift</kbd> pressed: {0}", keyboard.ShiftKeyDown);

Console.WriteLine("Caps Lock on: {0}", keyboard.CapsLock);
Console.WriteLine("Num Lock on: {0}", keyboard.NumLock);
Console.WriteLine("Scroll Lock on: {0}", keyboard.ScrollLock);
The interesting feature is the SendKeys method, which lets you simulate keystrokes in the active window:
Note: If you're using a console application (or something that doesn’t handle window messages), use the overload with a boolean parameter and set it to true.
keyboard.SendKeys("Hello world!");
keyboard.SendKeys("Hello world!", true);
Mouse
 Microsoft.VisualBasic.Devices.Mouse does not let you control a mouse like in The Matrix—it only provides status information via three properties:
- ButtonsSwapped – Are the left and right mouse buttons swapped?
- WheelExists – Does the mouse have a wheel?
- WheelScrollLines – How many lines does a single notch scroll?
Ports
Need to work with serial (COM) ports? Microsoft.VisualBasic.Devices.Ports simplifies this, though it doesn’t provide anything you can’t already get from System.IO.Ports.SerialPort—it just saves a few lines of code.
The OpenSerialPort method does the following:
- Creates a new System.IO.Ports.SerialPort.
- Calls Open on the port.
- Returns the port.
Three lines of code wrapped into one for convenience.
Additionally, the SerialPortNames property returns a ReadOnlyCollection of available port names—though calling GetPortNames() directly on SerialPort is faster if you don’t need the collection type.
[This blog is part of a larger series; to find more parts in the series, please see the Series Index]
For today, we will be looking at a very useful class, ComputerInfo, which provides a small set of information about the computer. It doesn’t provide a lot of details, but the information it does provide is key:
- OSFullName: The "nice" name for the OS—like Windows 7 Ultimate
- OSVersion: The OS version number
- OSPlatform: The OS platform
- TotalPhysicalMemory, AvailablePhysicalMemory, TotalVirtualMemory, AvailableVirtualMemory: Memory usage information
- InstalledUICulture: The culture used during installation—this is identical to System.Globalization.CultureInfo.InstalledUICulture
ComputerInfo info = new ComputerInfo();
Console.WriteLine("You are running {0} ({1})", info.OSFullName, info.OSVersion);
Console.WriteLine("\tthis is built on the {0} platform.", info.OSPlatform);

UInt64 usedPhysical = info.TotalPhysicalMemory - info.AvailablePhysicalMemory;
UInt64 usedVirtual = info.TotalVirtualMemory - info.AvailableVirtualMemory;

Console.WriteLine("Memory Information in Mb (Available | Used | Total)");
Console.WriteLine("\tVirtual: {0} | {1} | {2}", info.AvailableVirtualMemory / 1048576, usedVirtual / 1048576, info.TotalVirtualMemory / 1048576);
Console.WriteLine("\tPhysical: {0} | {1} | {2}", info.AvailablePhysicalMemory / 1048576, usedPhysical / 1048576, info.TotalPhysicalMemory / 1048576);

Console.WriteLine("You are running the following culture: {0}", CultureInfo.CurrentCulture.EnglishName);
if (CultureInfo.CurrentCulture != info.InstalledUICulture)
{
    Console.WriteLine("BUT you installed with {0}", info.InstalledUICulture.EnglishName);
}
else
{
    Console.WriteLine("and you installed with that culture too");
}
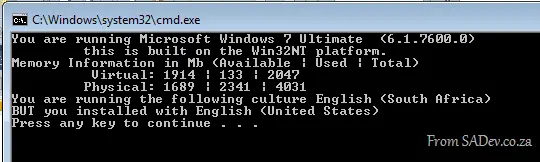
This gives us:
This isn’t the only way to get computer information; there is plenty available elsewhere in the framework—for example, the System.Environment class from the mscorlib assembly includes:
- Environment.Is64BitOperatingSystem
- Environment.Is64BitProcess
- Environment.MachineName
- Environment.OSVersion
- Environment.ProcessorCount
- Environment.Version
[This blog is part of a larger series; to find more parts in the series, please see the Series Index].
Yesterday’s post covered some interesting, yet very simple features in Microsoft.VisualBasic, so today I thought I would cover some more complex code: financial.
This is a class with 13 static methods, all returning a Double. And if financial code wasn’t complex enough, the method names are as cryptic as you can get. I’ve broken them into three groups: cash flow, general, depreciation, and annuity-based.
Cash Flow
These calculations look at investments and cash flows:
- IRR: Provides the internal rate of return for a series of periodic cash flows.
- MIRR: Provides the modified internal rate of return for a series of periodic cash flows.
- NPV: Provides the net present value of an investment.
Example of using the above methods:
// Need to place to store profit/loss
// Must have at least one negative and one positive value in it
IList<double> values = new List<double>();

values.Add(-100000); // startup costs - costs money to make money
values.Add(10000); // income in first year
values.Add(15000); // income in second year
values.Add(17500); // income in third year
values.Add(75000); // income in fourth year - got govt. contract that year😉

double[] valuesArray = values.ToArray();

double loanRateGuess = 0.1; // start guessing loan at 10%
double rateIRR = Financial.IRR(ref valuesArray, loanRateGuess) * 100;

double reinvestmentRate = 0.12; // MIRR also includes the reinvestment rate 12%
double rateMIRR = Financial.MIRR(ref valuesArray, loanRateGuess, reinvestmentRate) * 100;

// Working out net present value needs a fixed rate
double fixedRate = 0.08; // 8%
double netPresentValue = Financial.NPV(fixedRate, ref valuesArray);

Console.WriteLine("Net present value: {0:0.00}", netPresentValue);
Console.WriteLine("Rate of return is:");
Console.WriteLine("\t{0:0.00}% (Calculated using IRR)", rateIRR);
Console.WriteLine("\t{0:0.00}% (Calculated using MIRR)", rateMIRR);
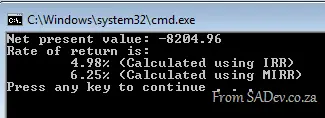
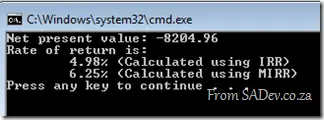
Gives us:
Depreciation
I understand depreciation as: how much value an item loses over time.
- DDB: Allows you to work out depreciation using the double-declining balance method (DDB) or a custom method. The DDB calculation per period is: Depreciation / Period = ((Cost – Salvage) × Factor) / Life
- SLN: Provides a value specifying the straight-line depreciation of an asset for a single period. SLN is calculated using: (Cost – Salvage) / Life
- SYD: Provides a value specifying the sum-of-years’ digits depreciation of an asset for a specified period. This is similar to DDB but calculated differently.
Example of using all the above methods to figure out how much you lose on an iPhone over two years:
double iPhoneInitialCost = 10000;
double iPhoneResale = 3500;
double yearsUntilNextUpdate = 2;
double depreciationPerYear = Financial.SLN(iPhoneInitialCost, iPhoneResale, yearsUntilNextUpdate);
double sydValue = iPhoneInitialCost;
double ddbValue = iPhoneInitialCost;
for (int year = 1; year < yearsUntilNextUpdate + 1; year++)
{
double syd = Financial.SYD(iPhoneInitialCost, iPhoneResale, yearsUntilNextUpdate, year);
double ddb = Financial.DDB(iPhoneInitialCost, iPhoneResale, yearsUntilNextUpdate, year);
sydValue -= syd;
ddbValue -= ddb;
Console.WriteLine("In year {0} you will lose", year);
Console.WriteLine("\t {0:0.00} (Calculated using SYD)", syd);
Console.WriteLine("\t {0:0.00} (Calculated using DDB)", ddb);
Console.WriteLine("Phone value");
Console.WriteLine("\t {0:0.00} (Calculated using SYD)", sydValue);
Console.WriteLine("\t {0:0.00} (Calculated using DDB)", ddbValue);
Console.WriteLine();
}
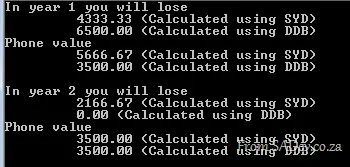
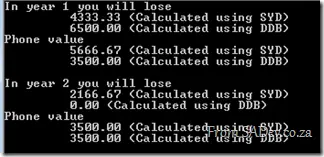
Which gives us the painful realization of how quickly value is lost:
Annuity-Based
An annuity is a series of fixed cash payments made over time. An annuity can be a loan (such as a home mortgage) or an investment (such as a monthly savings plan).
If you are working out annuities, there is a number of calculations around those:
- If you have the payment, period, and interest, you can work out the future value using FV over a period.
- If you have the future value, payment, and period, you can work out the interest using IPmt over a period.
- If you have the future value, payment, and interest, you can work out the period using NPer over a period.
- If you have the future value, period, and interest, you can work out the payment using Pmt over a period.
Other methods around annuities:
- PPmt: Calculate the principal payment of an annuity.
- PV: Calculate the present value of an annuity.
- Rate: The interest rate per period for an annuity, calculated by iteration.
Example of using FV to work out savings:
double monthlySavings = 1000;
double interestRate = 8;
double yearsYouWillSave = 10;
double deposit = 0;
DueDate dueDate = DueDate.EndOfPeriod;
if (interestRate > 1)
{
interestRate = interestRate / 100;
}
interestRate = interestRate / 12;
double months = yearsYouWillSave * 12;
double savings = Financial.FV(interestRate, months, -monthlySavings, -deposit, dueDate);
Console.WriteLine("In {0} years, you will have saved: {1:0.00}", yearsYouWillSave, savings);
Gives us: