I recently had the fun of recording another video for the ALM Rangers treasure map project, this time showing all the work I did for the 2.1 release. You can view it below—hopefully you like it!
Part of this video is a serious attempt at figuring out how to build great coding videos. When I compare it to Let’s Plays on YouTube, the issue with coding is that it’s primarily a thought process. So the idea of recording the coding and then talking about it afterward is one way to solve that. The pop-ups and music are all meant to enhance the video.
If you have any other ideas or comments on this, please let me know—I’d love to hear them!
[ ] Last night, I shipped the latest version of Amazing Lock Screen—the very popular app (4 stars from 800 ratings, just under 70k downloads)—which brings in some new features.
Visual Improvements
First off, it’s for Windows 8.1 only—so get that upgrade! Next, there are some UI tweaks, nothing too major around that front, but I think they’re still visually interesting.
The most obvious visual improvement is around the tiles. We now have wide tile support (in addition to the square) and it’s a live tile, which shows the last 5 days’ worth of images!
[ ] [
] [ ]
]
Image Handling
[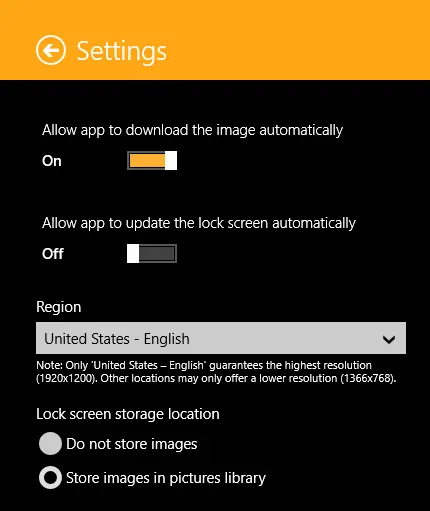 ] However, that’s not the major reason for this release. The major new features are a bunch of settings. By default—and how we’ve always done it—the app downloads the image to a temp folder and then sets the lock screen. For release 1.4, we’ve made each of those steps a setting, so:
- You can control if it downloads automatically now.
- You can control if it sets the lock screen automatically.
- You can control the location (temp or pictures library).
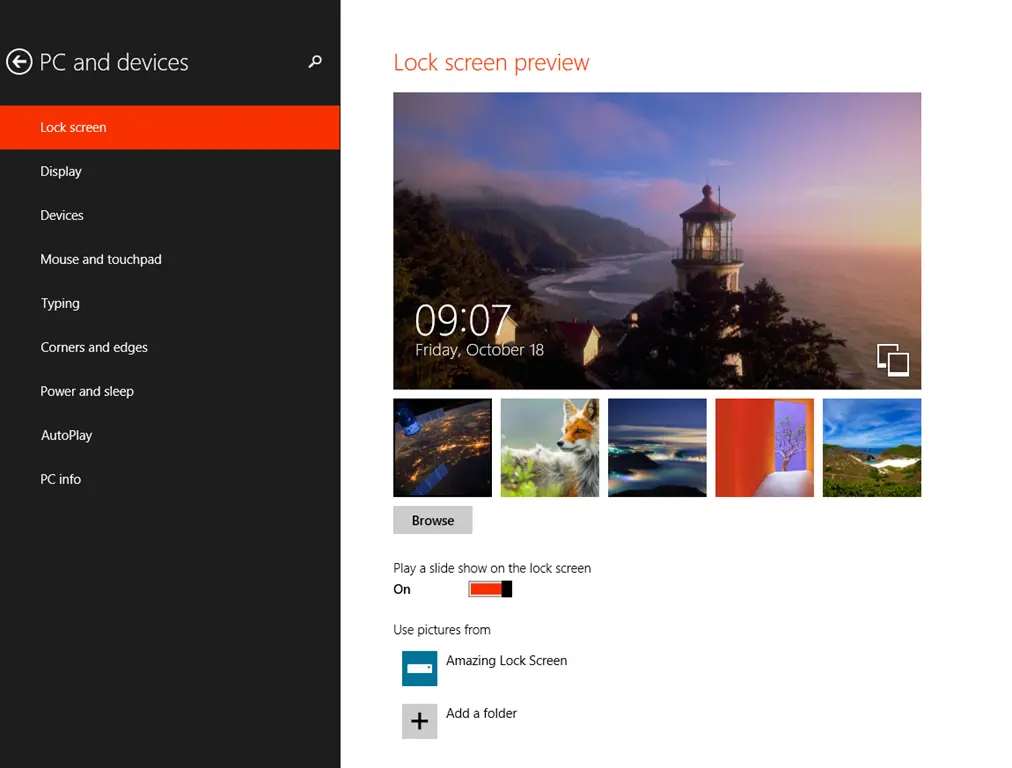
So what does this allow you to do? To the right are my settings, where I have it download automatically, download to the pictures library, and not update the lock screen.
Using this combination, I can add the folder under pictures to the normal lock screen settings and set it to be a slideshow (see settings below).
[ ]
]
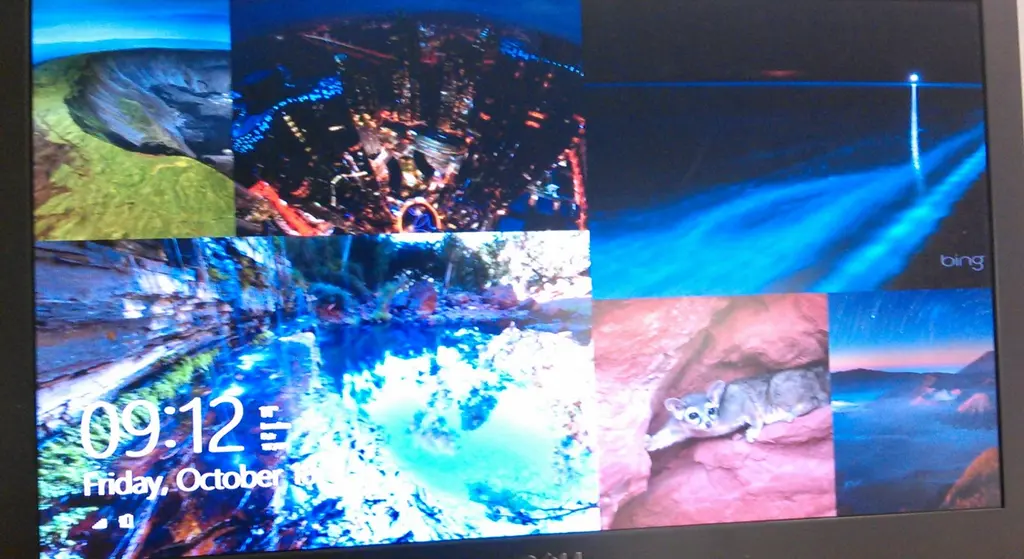
Since Windows is checking a folder for images and the app isn’t setting the image, it allows for amazing lock screens built from MULTIPLE pictures from Bing—it looks amazing!
(shitty camera phone)
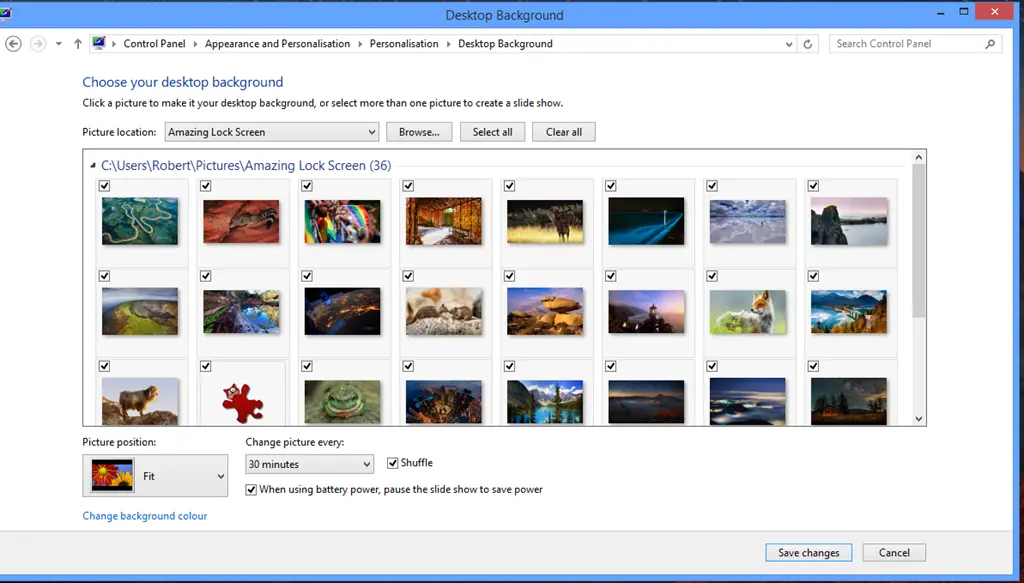
The second trick? Because we no longer use temp, I can also use the Bing images for my desktop wallpaper by setting the wallpapers to point to the Amazing Lock Screen folder.
I hope you enjoy using this release—please send feedback!
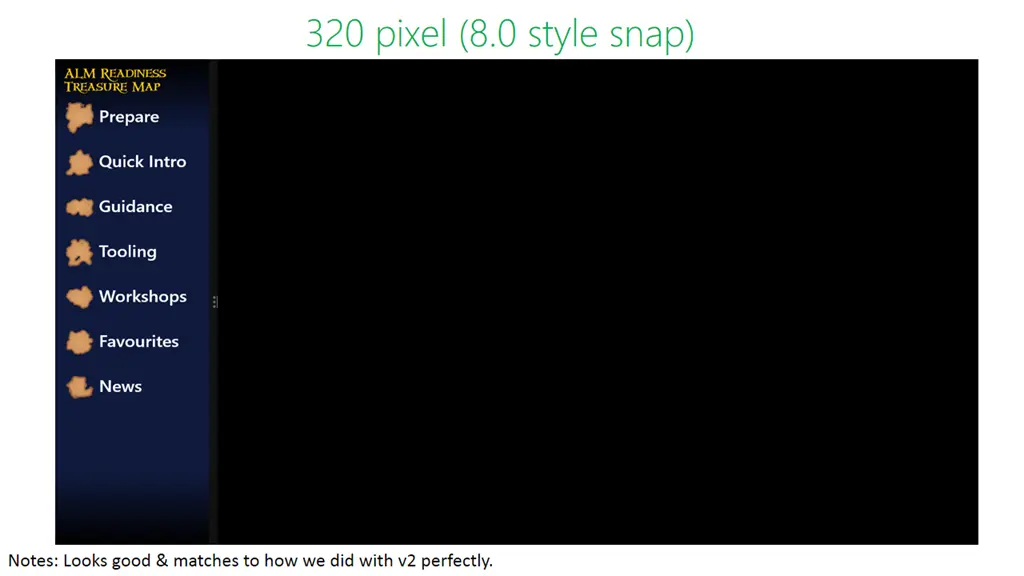 As part of my work on the Microsoft ALM Rangers Treasure Map, I want to share how we changed snap for the 2.1 release.
Why?
The first question is: why do we need to change snap for 2.1? The requirement is that 2.1 focuses primarily on supporting Windows 8.1, and Windows 8.1 handles snap differently from Windows 8. In short, in Windows 8, you had snap (fixed-width), fullscreen, and a third “middle” state—but Windows 8.1 only offers fullscreen and any width between that and a minimum threshold.
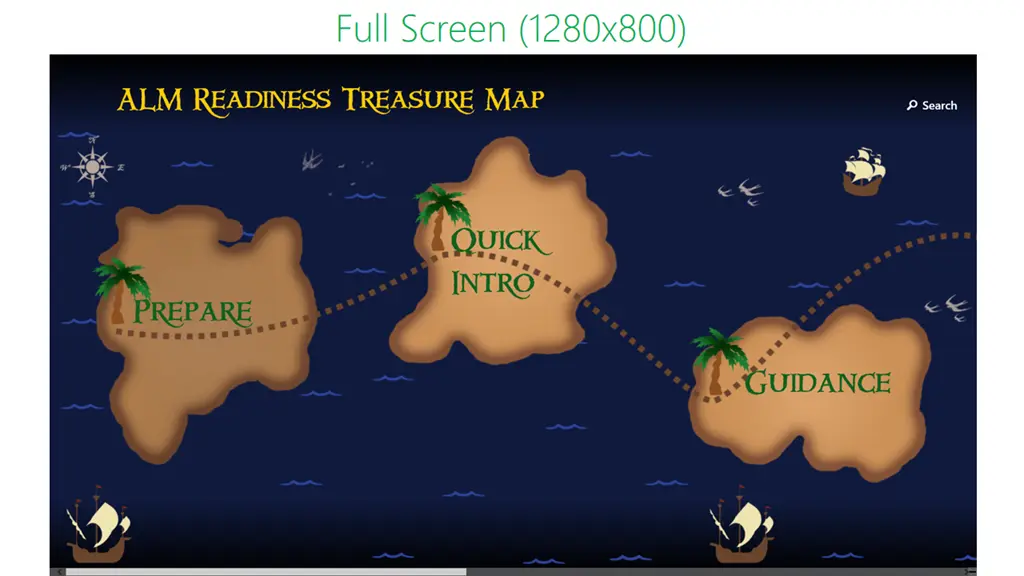 Microsoft has written a great document covering what’s new at: http://msdn.microsoft.com/en-us/library/windows/apps/hh465371.aspx
Planning
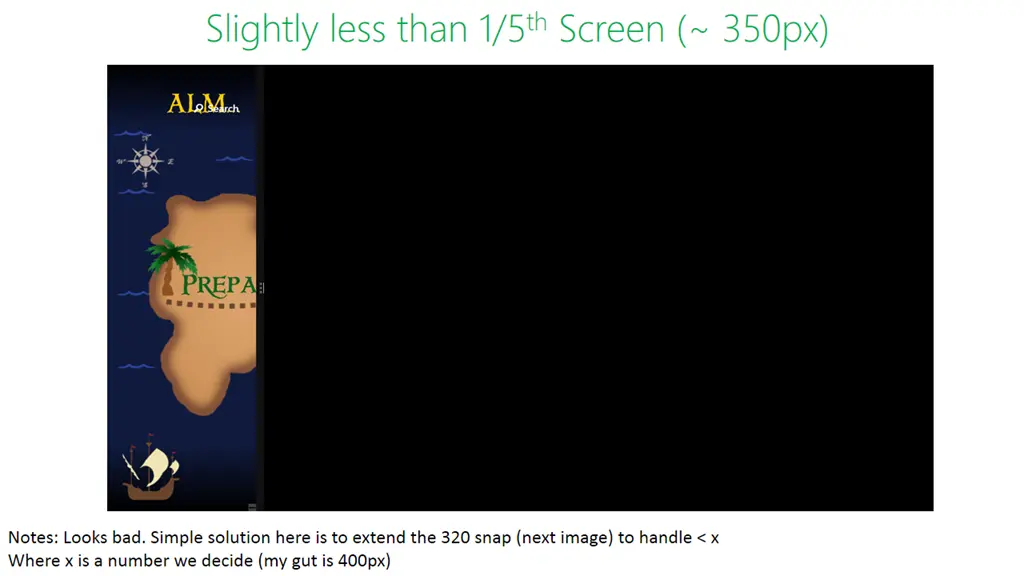
The first step was to investigate our current setup: I ran the app on Windows 8.1, played with the new snap experience, and took screenshots with annotations to guide our approach. You can see these images alongside/below this post.
Decisions
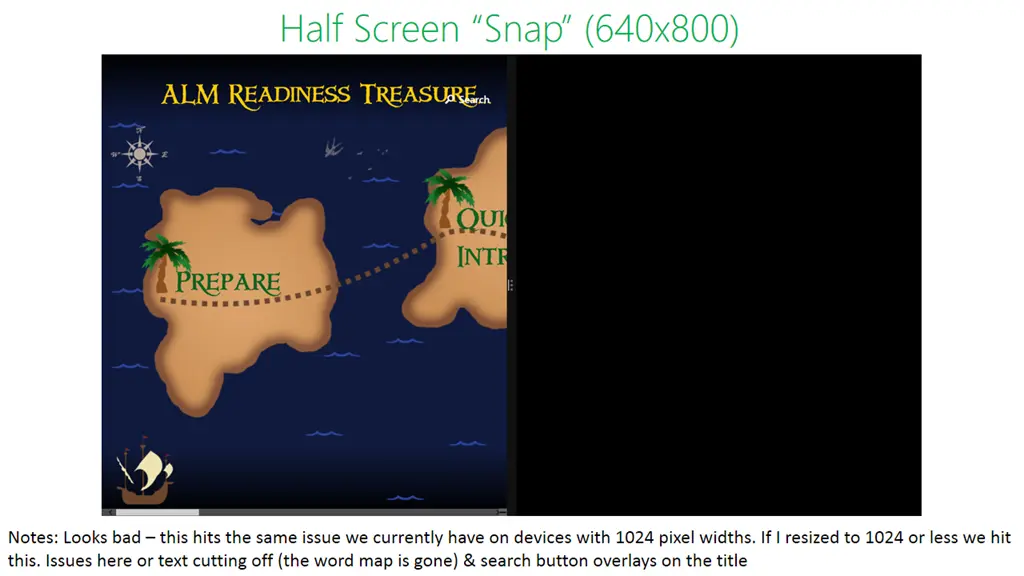 Since this was a minor release, we decided not to overinvest. Instead of building something entirely new, we ensured everything worked as it did before.
To achieve this, we set a minimum width of 320 pixels (the default in Windows 8.1 was 500), aligning with our Windows 8 baseline.
Code
In version 1, we chose not to use the built-in State Manager approach for UI changes. You can learn more about our implementation in a video I did for Channel 9: 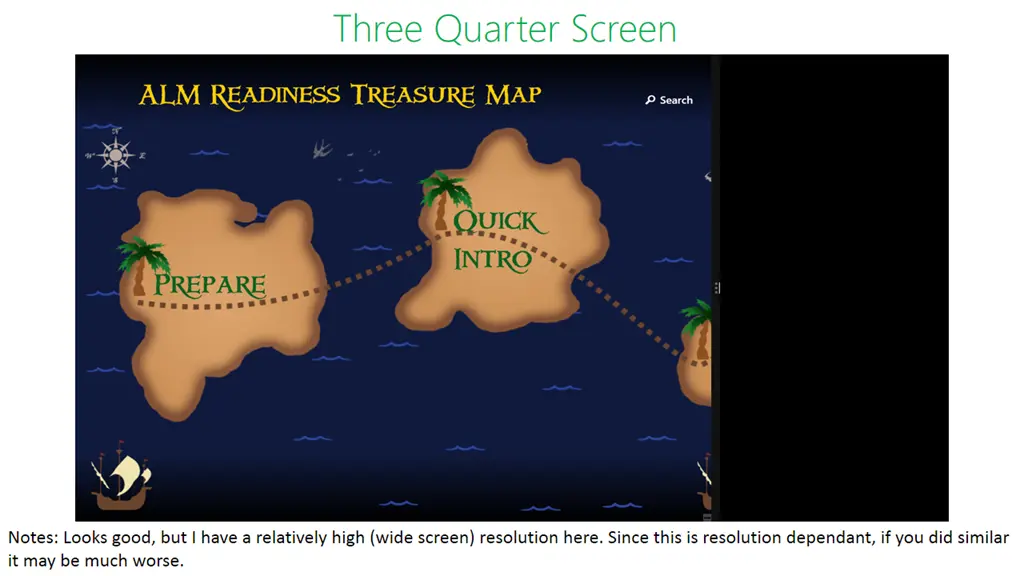
What did the code changes look like with our model? In the image below, you’ll see that instead of querying the current state (line 142, left), we now check the screen width and load the corresponding namespace based on that.
This minor change sufficed—made possible because we decoupled views from the start, avoiding a single, all-encompassing Visual State Manager-driven view.

When I speak to people about Scrum, I often hear people describe Scrum as: Waterfall but with shorter iterations. That view, imho, is fundamentally wrong and will lead to you not getting any of the benefits from using Scrum.
Waterfall Myths
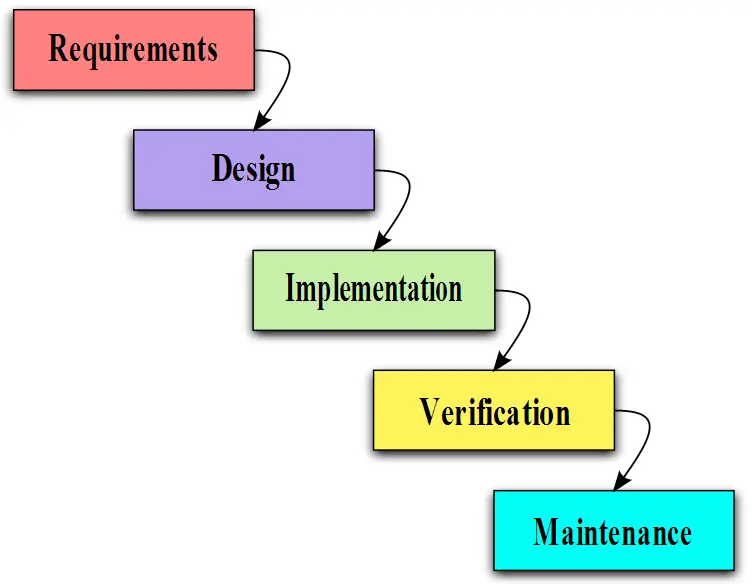
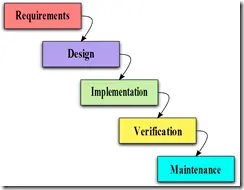 Waterfall provides a structured approach to software development and has a reputation for taking a long time to deliver because each phase must occur and must occur in order. In reality, Scrum is very similar and has many of the same steps, in the same order as Waterfall.
So what about the length of time issue? Waterfall seems to be used around massive projects which take months or years to ship, yet Scrum is great because you have a minimum viable product (MVP) every four weeks. That isn’t true either—a lot of the myth here is because during the scoping of a project using Waterfall, everyone puts everything in. In reality, nothing stops you from having smaller deliverables of an MVP while using Waterfall.
The last myth to dispel is that Scrum is better than Waterfall because it allows the product owner to change the goals as they learn about what is built and the market conditions change. Waterfall does allow that too. In Waterfall, it is called change controls, and, done right, they work very well.
In addition, if you use smaller iterations with Waterfall, you can use the requirements, design, and verification stages as you would sprint planning and retrospectives to adjust the course of the team.
How is Scrum different from Waterfall?
A side thought: Is the difference in ownership also why projects using Waterfall seem to fail more than those using Scrum? It isn’t the methodology, but rather it is the commitment of the people doing the work that drives the success or failure of the project. For projects using Waterfall that are successful, I think you will find that they do many things outside the methodology to ensure everyone feels committed to the success.
If Waterfall can offer everything that Scrum does too, how then is Scrum different? The major difference between the two methodologies lies in the psychology of the developers involved in the project:
- Waterfall: Has a single centralized ownership for the project.
- Scrum: Has a distributed ownership for the project.
That may not make much sense, so let me explain what I mean by ownership of the project. Ownership of the project is made up of several things:
- How much responsibility a person involved has?
- How much authority a person involved has?
- How much control and influence a person involved has?
When we look at Waterfall, the developers involved in the project have very little with regard to the above conditions. Those conditions are almost solely handled by the project head and project managers, and because of this lack of authority, responsibility, and influence, the developers are not invested in the ultimate delivery of the project.
Scrum, on the other hand, drives varying levels of responsibility, authority, and influence to everyone involved. For example, the product owner has the most responsibility, but there is still responsibility shared among the rest of the team. It is impossible in Scrum for a developer to bury their head in the sand and say that the problems are not their problem.
Conclusion
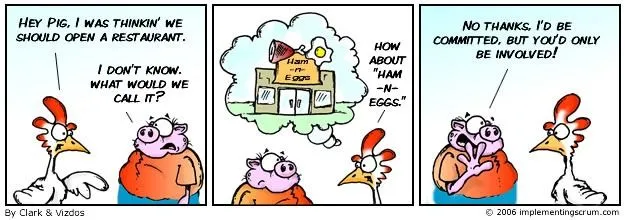
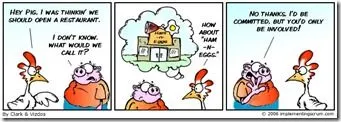 For me, the major difference can easily be summarized using the old fable of The Chicken and the Pig. Waterfall allows developers to be chickens, but Scrum requires developers to be pigs.
Choosing between Waterfall and Scrum isn’t so much about choosing between methodologies as choosing between designs of ownership and responsibility. That design is vital because how your team is designed directly impacts what you ship.
IT is a very new industry compared to other industries, and as such, there is still a lot of flux as we learn and mature as an industry. One of those areas is job titles. It may seem odd that something as fundamental as a job title is still in flux, but in my view, it is because we do not yet have universal standards. Sometimes—and to a lesser degree—we are breaking new ground and new job titles must be constructed to match new roles.
The job title Architect, though, seems to have nearly universal usage in the IT industry to denote an expert or leader in a specific area. In fact, my current job title is Technology Architect. However, there are problems with the usage of the title Architect in IT, and I want to share some of the issues I see with it.
Architectural Profession Act of 2000
In South Africa, there is a piece of legislation called the Architectural Profession Act of 2000, which defines the rules and governing bodies for architects—not in IT, but in the building/construction space. One of its sections (section 18) specifies that certain titles may only be used by professionals registered with the architectural council. Those titles are:
- Professional Architect
- Professional Senior Architectural Technologist
- Professional Architectural Technologist
- Professional Architectural Draughtsperson
- Candidate Architect
- Candidate Senior Architectural Technologist
- Candidate Architectural Technologist
- Candidate Architectural Draughtsperson
In short, if you, as an IT person, use any of those titles, you are breaking the law.
What Does an Architect Imply?
In IT, we use the term Architect to denote some level of senior status for a person. However, without a standard or governing body, anyone can use that title. When I was a much younger developer, thrust into a late-stage project to lead it, I was sold to the customer as an "architect." Why was that title applied to me? It wasn’t because of my skills or experience—it was to convey that I knew what I was doing and, more importantly for the sales team, to justify charging more for my time.
In the building/consulting space, if you want to be a professional architect, you must study at a university for 5 years to reach the junior architect level—and to be a senior, you need years of real-world experience.
By adopting the same title as another industry, we must honor their usage. If we continue to abuse the legacy of the title, we’ll devalue it in our own industry and make IT seem immature in the eyes of the broader world.
What Should an Architect Do?
We should not only be careful about who we apply the term Architect to but also ensure it’s reserved for those who actually perform IT architecture work—something highly specific that requires specialized training and tools like TOGAF or the Zachman Framework. If you’re not doing that work, you shouldn’t be using the title.
This seems obvious, but we fail at this too often. Imagine calling a plumber whose truck and business cards say "electrician"—would you trust them to fix your pipes?
Summary
In my view, unless you’re engaged in real IT architectural work—and have years of experience in IT and architecture—you shouldn’t use the title. If you are doing the right work, ensure your title clearly distinguishes it from the building/construction realm, such as by using Software Architect or IT Architect.
The IT industry needs to do better with titles—or we’ll continue to devalue ourselves in the eyes of our customers. This is one way to start fixing it.
For other posts in this series, see our series list.
In the previous examples, we have always passed data to a simple browse screen. Passing data to a screen where you add an item is slightly more complex, so we will explore how to solve that. It may seem that what we did in example 3 wasn’t useful, since example 4 showed a better way—however, there are times when you can’t do that, so we will also cover that. Finally, we will conclude with a better approach: using a
This post, and the rest in the series, will be a bit shorter as we are covering the same theme but applied in different ways—so make sure you read the preceding parts, or you may feel a bit lost.
As with each part of this series, the code can be found on GitHub
The corrected version of the GitHub link section is:
As with each part of this series, the code can be found on GitHub.
Example 5a: Passing information to an “add” screen with JavaScript
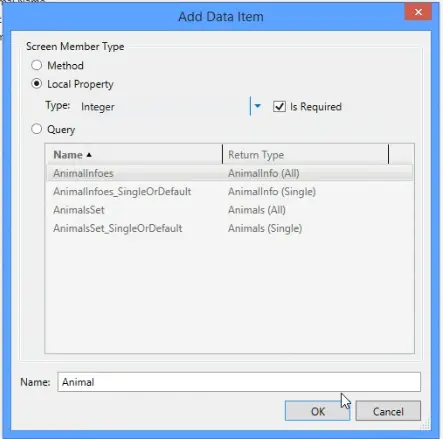
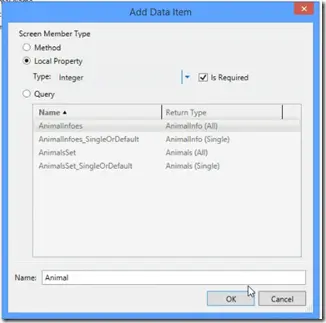
- On our add screen, we start by adding a data item. We will name it Animal and set the type to Integer. The point of using Integer is to show that the type of the property doesn’t matter to JavaScript. Setting it to a different type than we expect only affects tooling. Lastly, we set it to be a parameter.
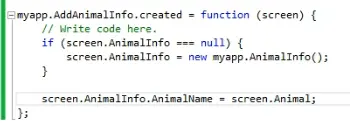
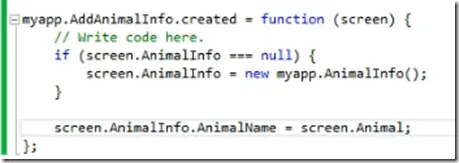
- Now we will do the code for the create event, and here we need to do two things. As this is an “add” screen, the first bit of code ensures we have an object defined. AnimalInfo is the object the screen monitors and will persist to the backend—so if it isn’t defined (
null), we must create our own. We do this with:
if (screen.AnimalInfo == null) {
    screen.AnimalInfo = new myapp.AnimalInfo();
}
And then we follow that with the simple line of code to assign the name of the animal from our data item: screen.AnimalInfo.AnimalName = screen.Animal;
Note: even though we set the property (which is of type string) to an integer—it just works.
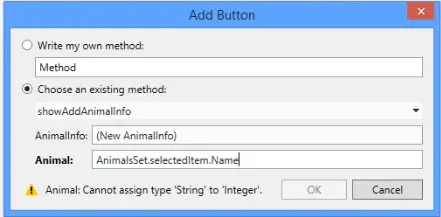
- I mentioned that tooling becomes a problem if we don’t use the right types, so to see how that occurs, we’ll add a button to the browse screen (the one we used in the last example) and try to open it, then set the name—but Visual Studio doesn’t allow this.
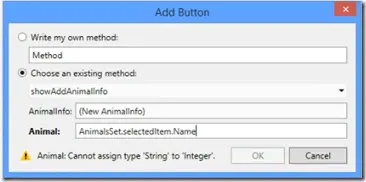
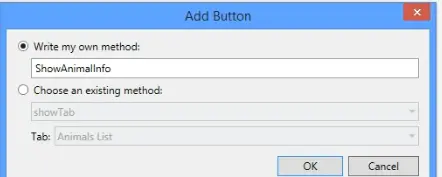
- We can just work around this in code, starting on the browse screen by adding a button with the method named ShowAnimalInfo.
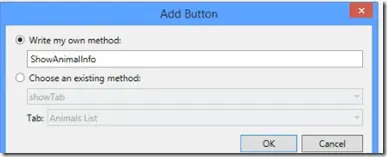
- The code we use in the button is very simple:
myapp.showAddAnimalInfo(null, screen.AnimalsSet.selectedItem.Name);
This should look very similar to example 4, except for the null in the first parameter (since we want the add screen to create the object associated with the screen, which we covered in step 2). The second parameter passes the selected item's name to the screen. Once again, the tooling expects an integer, but JavaScript is dynamic, so it accepts a string.

- That’s it! It all just works!
Example 5b: Passing information to an “add” screen—working with the tooling
This final example demonstrates how nice the tooling is when you pass the correct types and how you can achieve the same result without JavaScript. If you check the demo code, this is in the AddAnimalsInfoSmart screen.
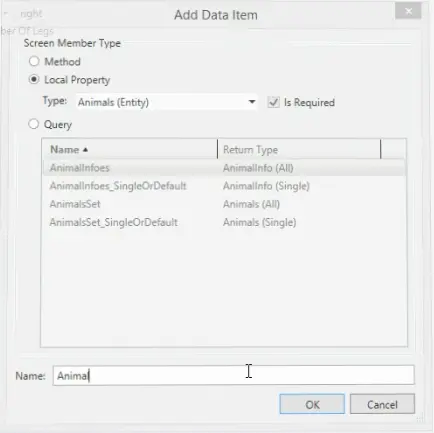
- The main difference here is the type of the data item we add as a parameter. For this, we set the type to Animals (Entity).
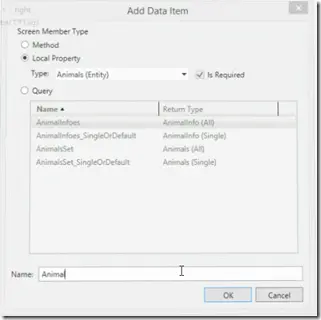
- Now we need to write some code again in the create event. Since we’ll only use the tooling to launch this screen, we don’t need to check if the object is set. All we need to do is set the values.

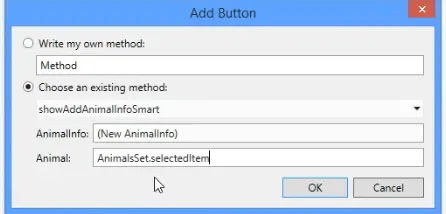
- Finally, we add the button to the browse screen using Visual Studio without JavaScript, and we can use IntelliSense to select the right options:
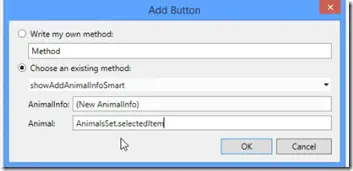
This second route is way better and what I recommend using—but it’s great to know that if you ever find yourself in a situation where two types don’t match up, you can work around it with a trivial amount of code.
For other posts in this series, see our series list.
In our last example, we passed data from one screen to another using a bit of JavaScript. However, there are two issues:
- If you do not select an item before clicking the button—it errors.
- It requires code, and LightSwitch is about making the drudge work easier, so how can it help here?
This post, and the rest in the series, will be a bit shorter as we are covering the same theme but applied in different ways—so make sure you read the preceding parts or you may feel a bit lost.
As with each part of this series, the code can be found on GitHub.
Example 4: Passing a database item without JavaScript
On the BrowseAnimals screen we already have, we once again add a button to the screen in the command bar with the following properties:
- Choose an existing method:
showWeasel - data:
AnimalsSet.selectedItem.Name
What we are doing here is having the Weasel_screen shown, and because we added a parameter, we can use the built-in tools to set that parameter to a data item on the screen.
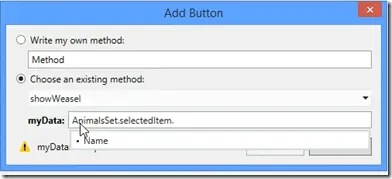 (In the above image, the parameter is labeled
 myData—for our example, it will be data.)
This is it! It is far simpler than example 3 and also doesn’t have the issues we mentioned at the start, so you should always use this option if you can.
For other posts in this series, see our series list.
In the first example, we looked at the core concept behind passing data and followed that by understanding the power that having a dynamic language in LightSwitch offers us. In both examples, we passed a string that we hardcoded—what if we want to pass something from our database layer?
This post, and the rest in the series, will be a bit shorter as we are covering the same theme but applied in different ways—so make sure you read the preceding parts or you may feel a bit lost.
As with each part of this series, the code can be found on GitHub.
Example 3: Passing a database item with JavaScript
- We start off by creating a table, Animals—which just has a Name column for the name of the animal we will capture.

Next, we will create a simple screen to add an animal and a second screen to browse the list of animals.
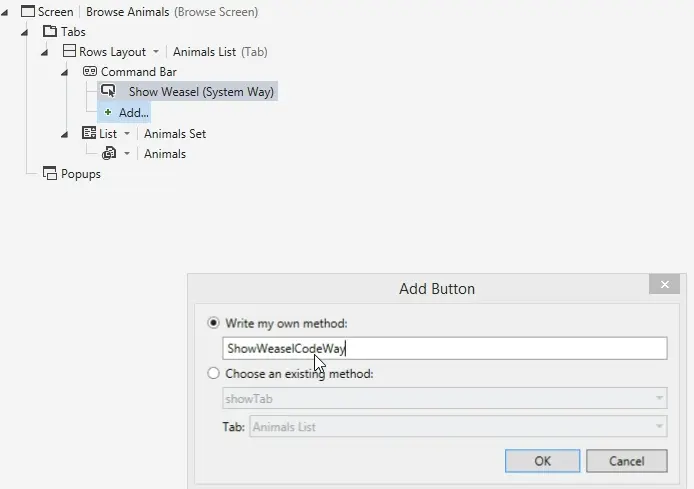
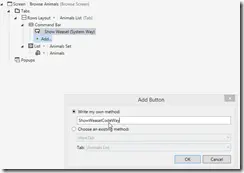
On the new Animals browse screen, we will add a button named ShowWeaselCodeWay—the idea here is that you will select an animal from the list of animals and click the button. That will launch the same Weasel screen from part 1. For this example, I am adding it to the command bar.
- Next, we need to edit the code to pass the parameter—so we use the execute event again and put in:
_myapp.showWeasel(screen.AnimalsSet.selectedItem.Name);
The only new code we are seeing here is the screen.AnimalsSet.selectedItem.Name part—which is as it sounds: for this screen, give the AnimalsSet data item (which powers the list), then give me the selectedItem in that, and lastly, give me the Name property of the selected item.

That’s it! Nice and simple, but not without its issues—which we will discuss & solve in the fourth example.
For other posts in this series, see our series list.
In part 1, we did the simplest solution—passing a string to a screen. In this post, we will make two changes to that idea.
As with each part of this series, the code can be found on GitHub.
Example 2: Passing objects and avoiding ugly global variables
The core concept to learn in this example is that JavaScript is a dynamic language—it is fundamentally different from a static language like C# and those differences allow us to produce much cleaner code.
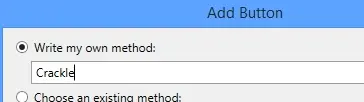
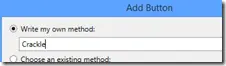
- We start again with a button, which we’ll name Crackle.
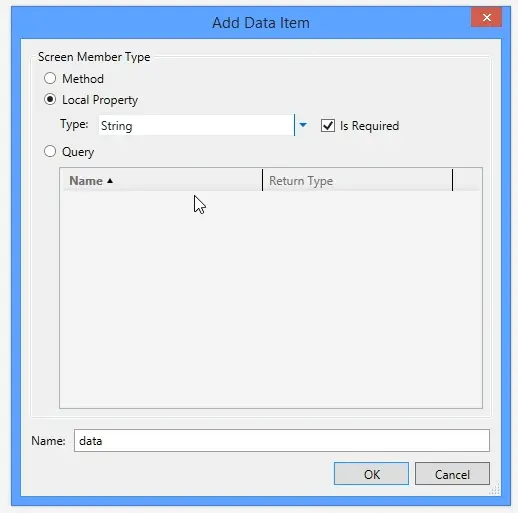
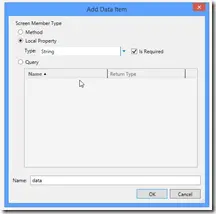
- We will also create a new screen, named Rice. On this new screen, add a data item with the following properties:
- Screen Member Type: Local Property
- Type: String
- Is Required: True
- Name:
data
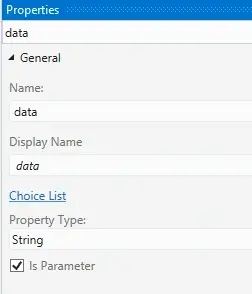
- Next, we modify the data item we added (
data), setting it to be a parameter.
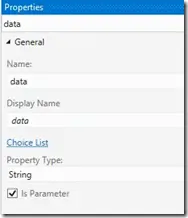
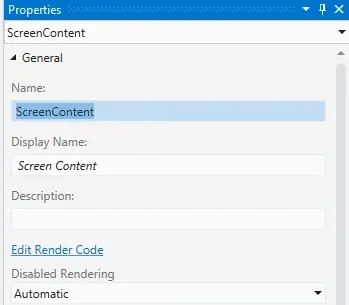
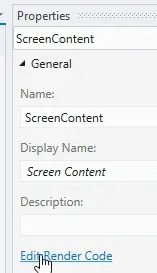
- To display the data, we’ll use a custom control again—this time setting its data to Screen. We won’t rename this new custom control, so it remains ScreenContent, as seen in the property pane.
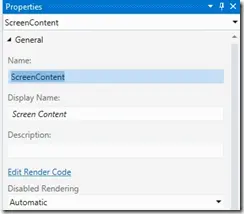
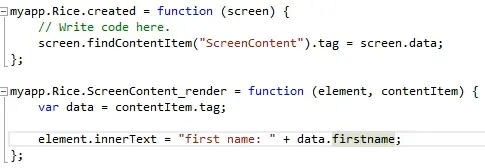
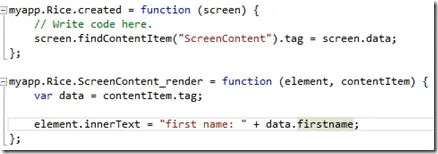
- Now, we add code to the create event for this new screen:
_screen.findContentItem("ScreenContent").tag = screen.data;_
Let’s break that down:
_screen.findContentItem("ScreenContent")_ – This method locates a control by name, returning it. We pass in the control added in step 4._.tag_ – Here’s a key example of JavaScript’s dynamic nature. The custom control doesn’t have a tag property by default, but referencing it dynamically adds it._screen.data_ – This references the parameter we set up in step 3.
Using the tag this way lets us pass data to controls without relying on global variables, unlike in the first example.
- Next, we render the data. Instead of just a string (as in example 1), we’ll use an object with properties. Here’s how:
var data = contentItem.tag;
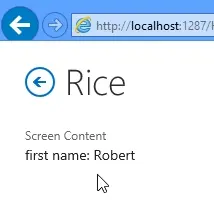
element.innerText = "first name: " + data.firstname;
Let’s break it down: - We access the
tag property of the control (passed as the contentItem parameter), which we set in step 5. This value is assigned to a variable called data. Note: This isn’t the same data as the screen’s data item from step 2. - We then set the
innerText of our control to render something, accessing the firstname property from our variable.
- Finally, we need to launch the screen. We go back to the button from step 1 and edit its execute code, adding:
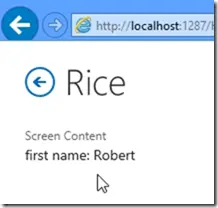
_myapp.showRice({ firstname: "Robert", surname: "MacLean" });_ This differs from the last example by passing an object with two properties, demonstrating JavaScript’s dynamic nature again. Despite being “defined” as a string parameter, we can pass an object—valid in JavaScript—allowing us to access properties for rendering in step 6. This contrasts with static languages like C#, where you’d cast objects instead of dynamically redefining their type.

All done!
For other posts in this series, see our series list.
Recently, I saw a question about how you can pass data between screens—which is something we do a lot in our system—so I thought I would share details on how we do it. There are a number of ways to do this, so we’ll start this series with a simple way of passing a string.
As with each part of this series, the code can be found on GitHub.
Example 1: Passing a String
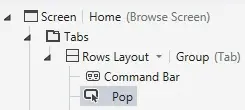
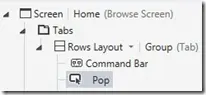
- For the first example, what we’ll do is pass a hardcoded string from a button on one screen to a second screen. We start by adding a button (called Pop) to a screen.
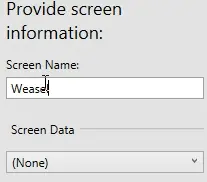
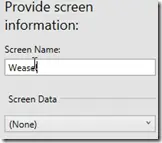
- Then, we create a new screen—Weasel—for this purpose.
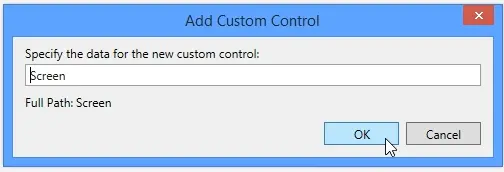
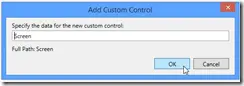
- On the new screen, we add a custom control and set its data to Screen.
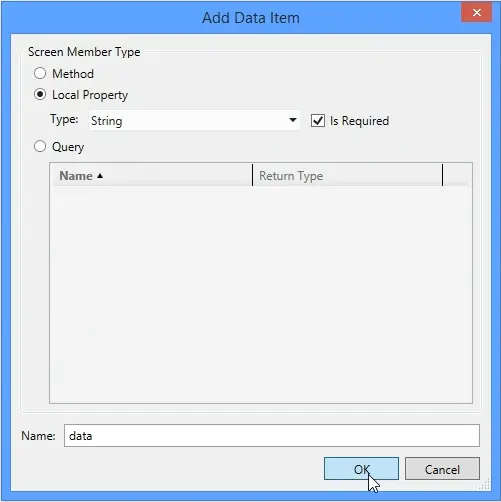
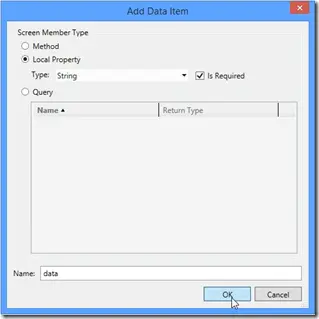
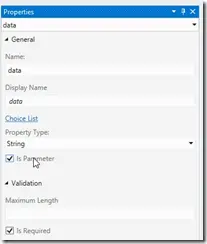
- The core of this method is adding a new data item. For this example, we specify it as follows:
- Screen Member Type: Local Property
- Type: String
- Is Required: True
- Name: data
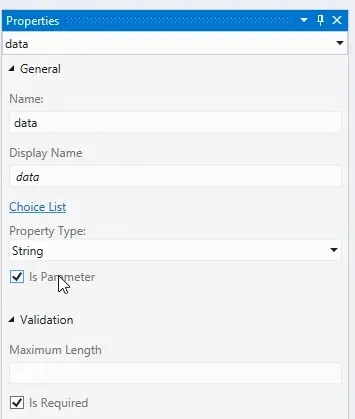
- After clicking OK, we select the data item on the right and go to its properties to check Is Parameter.
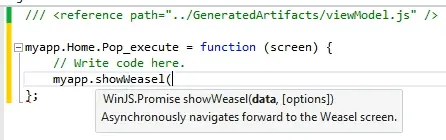
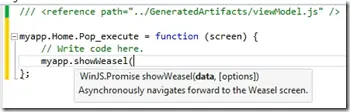
- For the execute event of the Pop button, we add this code:
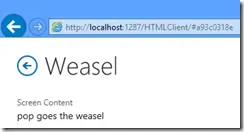
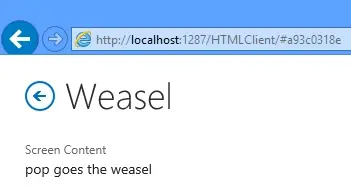
myapp.showWeasel("pop goes the weasel");
We’re using JavaScript here—LightSwitch’s built-in functionality—to launch the code. If you’re unfamiliar with it, let’s break down what this line does: - myapp: The namespace for our app. Every LightSwitch app uses this.
- showWeasel: The method to launch the screen. LightSwitch follows the pattern
show[ScreenName]. - "pop…": The data we’re passing. Since we created the data item earlier and marked it as a parameter, it’s available as a method argument.
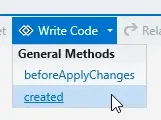
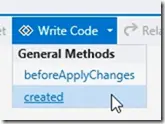
- Finally, we display the string on the Weasel screen by adding two events:
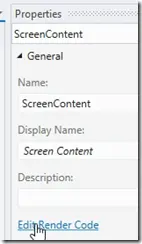
- Second, we select the custom control from step 3 and edit its render code to display
d:function elementRender() {
element.innerText = d;
}
This simply renders the string—useful here for demonstration.
- The final code (corrected from the screenshot’s typo) should look like this:
var d;
function screenCreated() {
    d = screen.data;
}
function elementRender() {
    element.innerText = d;
}
And that’s it! That’s how to pass a simple string between screens.