Windows Store app Development Snack: Publishing your app, what has to be done before you publish?


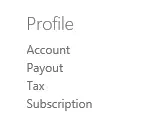 Development is done—and not just done, but done-done. You’ve logged into the Dashboard and want to submit your application. There are two things you must complete before publishing successfully, and both are under Profile in the right-hand menu.
Payout
Payout sets up which account will receive payment—if this isn’t set up, your app won’t even pass certification! You might assume this only applies to paid apps—but it doesn’t. All apps, even free ones, require this setup first.
When you set up payout, Microsoft will ask for one of three values (based on what I’ve observed):
- Credit card CVV – the simplest option.
- Transaction amount – Microsoft will process a test transaction; enter the cents portion of that amount.
- Transaction code – Microsoft will process a test transaction, and you’ll need the magic code in the description.
Below is an example from my account statement: if they ask for an amount, it would be 29 cents; if they ask for a code, it would be 851.

Two critical notes about payout:
- Limited attempts: You get only a few tries to input the correct details. If you get them all wrong, your account will be locked, forcing you to contact support for escalation—this can take DAYS.
- Transactions take time: If you don’t get a CVV check, you’ll receive one of the transaction checks. These may take time to appear, especially if you’re outside America—wait up to two days before acting. Do not guess, or you’ll hit your attempt limit.
Tax
The second requirement is tax compliance—everyone must complete this. However, invalid tax forms won’t block certification; they’ll only block publishing. The form itself is easy, but frustratingly, the status stays marked as "invalid" even after submission until Microsoft verifies it. Interpret "invalid" as either incomplete or still processing.