Slide.Show and SharePoint: Part I - Configuring Slide.Show


This is a multi-part series. The other parts can be found at:
- Slide.Show and SharePoint: Part II – Getting the data
- Slide.Show and SharePoint: Part III – Deploy and final config
This was inspired by a post on the IWSA](https://www.informationworker.co.za) group, about how to get a decent slide show in SharePoint using a picture library as a source. The poster went on to say he [Slide.Show looked like it would meet his need and wondered if it could be used. For those who do not know, Slide.Show is a cool Silverlight 1.0 component that takes a list of images and displays them as a slide show, with the presentation looking brilliant. Slide.Show has options like pausing, skipping the current image, viewing a grid of thumbnails so you can select which one to skip to, and even a full-screen view! It has, in fact, over 300 options you can tweak to get it just the way you like it! If you don’t know what SharePoint is, how is life under that rock? 😉 SharePoint (or, as it is officially known, Microsoft Office SharePoint Server) is a cool system too—it has all kinds of functions for document management. One of them is a picture library, but the downside of the picture library when displayed normally is a boring list or, if you configure it, one static picture… YAWN. So there’s a perfect harmony just waiting to occur!
But how can you use Slide.Show together with SharePoint? I wish it were as straightforward as adding a web part, but it isn’t. That said, it’s not difficult to get up and running and requires a few tricks and a bit of thinking outside the SharePoint box to get it working.
The first step is to add a Content Editor Web Part (CEWP), which can be found under the Miscellaneous section. 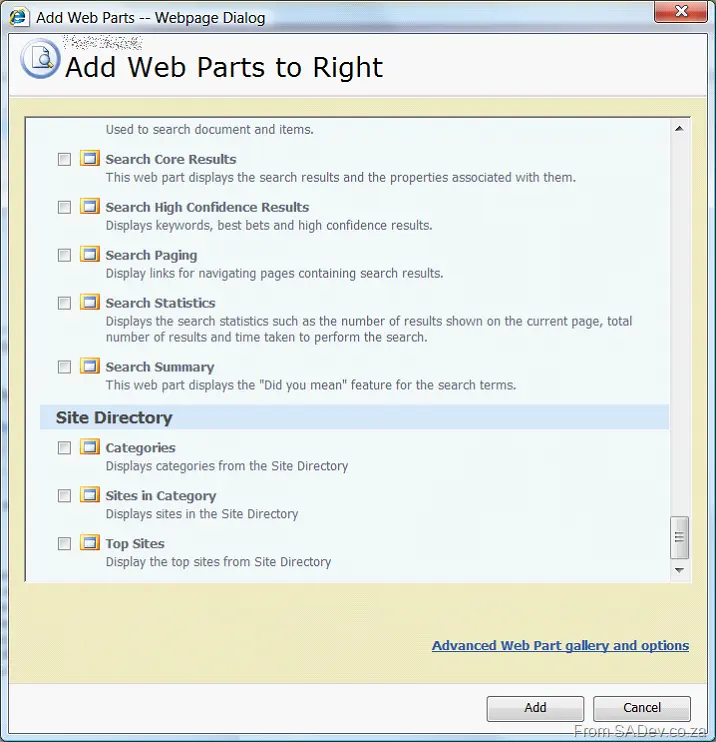
The CEWP is interesting because it allows you to set the content using rich text (à la Microsoft WordPad-like options) or actually put the HTML directly into it using the Source Editor option. The ability to put HTML directly in doesn’t mean just HTML—it means you can actually put anything in it and have total control over what will be rendered! Since we’ll be using a lot of JavaScript, this is exactly what we need to get Slide.Show into SharePoint. 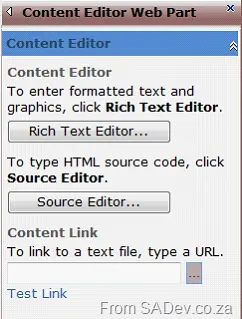
The first step in getting this working is to set up Slide.Show, so once you’ve downloaded the source package and extracted it, you need to run the release.bat file, which will combine a lot of JS files into two files in a release folder. You then need to take the release folder and place it in a folder under your SharePoint website—that’s definitely the cleanest way to configure it. However, I preferred to take the Slide.Show folder (part of the files extracted) and place it under the SharePoint website, as it allows me to run some tests more easily and get the system set up correctly, as shown in the screenshot below. 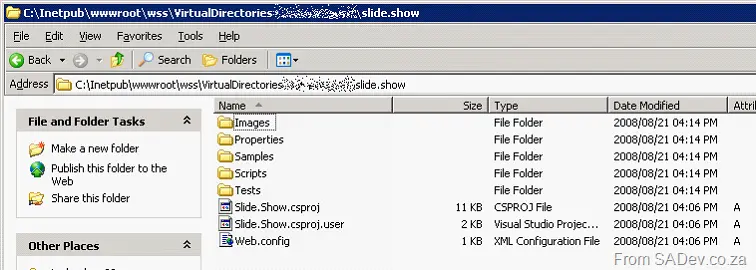
If you’ve also followed my thinking about taking the slightly messier config, you should be able to fire up your favorite browser and type in [http://
Now that Slide.Show is configured correctly, we’ll return to the CEWP and need to plop the code into it to make it work. Since the CEWP allows us to drop in any source, we’ll use that to put in the JavaScript we need for Slide.Show to work. This is where we lose the straightforwardness of doing this, because if you thought you could follow the Slide.Show quick-start guide and get it to work… you’d be in trouble. That’s because we can’t put <script> tags in the header of the page like the quick-start guide tells us—SharePoint won’t allow that. So our first step is to put our own code in to load and run the JS files, and then we can start using Slide.Show as normal.
To do this, we first need to tell the system that we’ll be running some JavaScript with a normal script tag:
Note: A complete version of the JavaScript is available at the end of the article (without numbering) to allow for easy copy-and-paste.
<script language="JavaScript">
Next, we’ll use the XMLHttpRequest class to load the JS file synchronously. However, if we just called XMLHttpRequest, this would only work in modern web browsers (IE 7 and higher, Firefox, etc.). But since so many people use older IE versions, we need to cater for them by adding a bit of code like this (source of the next 8 lines is not my brilliant mind but Wikipedia):
// Provide the XMLHttpRequest class for IE 5.x-6.x:
if (typeof XMLHttpRequest == "undefined") XMLHttpRequest = function() {
    try { return new ActiveXObject("Msxml2.XMLHTTP.6.0"); } catch(e) {}
    try { return new ActiveXObject("Msxml2.XMLHTTP.3.0"); } catch(e) {}
    try { return new ActiveXObject("Msxml2.XMLHTTP"); } catch(e) {}
    try { return new ActiveXObject("Microsoft.XMLHTTP"); } catch(e) {}
    throw new Error("This browser does not support XMLHttpRequest.");
};
For the following example, we’ll just load one file, but when we’re done, we’ll need to repeat this for all our JS files:
var silverlightRequest = new XMLHttpRequest();
silverlightRequest.open("GET", "/slide.show/Scripts/Release/Silverlight.js", false);
silverlightRequest.send(null);
Note: If you’ve put Slide.Show in a different location than I have, you’ll need to adjust the second line as needed. The last line of loading the file is to call the eval function, which allows us to execute the JavaScript from the JS we retrieved. This enables the classes and methods to be available to us:
eval(silverlightRequest.responseText);
Once we’ve loaded both Slide.Show JS files, we can then use Slide.Show as normal by calling:
new SlideShow.Control();
Lastly, we close our script block with:
</script>
Now click OK to close the HTML source code editor and OK (or Apply) again for the web part, and it should give us the same result as our first test—the empty sample. That’s kind of boring, so to wrap up part one in this series, let’s modify the Slide.Show creation line to load a configuration file from one of the samples. We’ll use the Flickr one since it requires nothing on the machine. The modified Slide.Show creation line with the configuration specified looks like this:
new SlideShow.Control(new SlideShow.XmlConfigProvider({ url: "/slide.show/Samples/Flickr/configuration.xml" }));
Now, you should have something that looks like the image below: 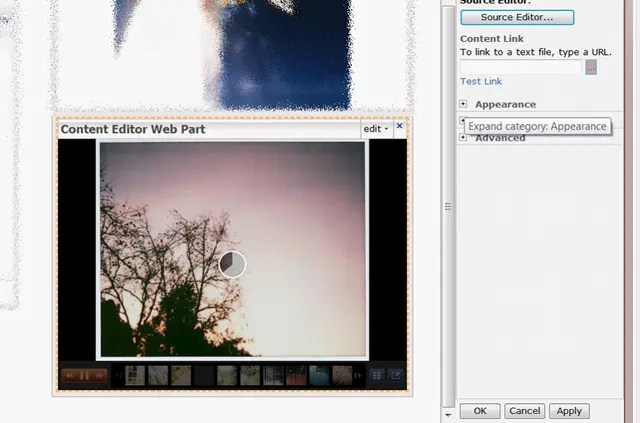
The full JavaScript that we would place in the CEWP to get this far would look like this:
<script language="JavaScript">
// Provide the XMLHttpRequest class for IE 5.x-6.x:
if (typeof XMLHttpRequest == "undefined") XMLHttpRequest = function() {
    try { return new ActiveXObject("Msxml2.XMLHTTP.6.0"); } catch(e) {}
    try { return new ActiveXObject("Msxml2.XMLHTTP.3.0"); } catch(e) {}
    try { return new ActiveXObject("Msxml2.XMLHTTP"); } catch(e) {}
    try { return new ActiveXObject("Microsoft.XMLHTTP"); } catch(e) {}
    throw new Error("This browser does not support XMLHttpRequest.");
};

var silverlightRequest = new XMLHttpRequest();
silverlightRequest.open("GET", "/slide.show/Scripts/Release/Silverlight.js", false);
silverlightRequest.send(null);
eval(silverlightRequest.responseText);

var slideshowRequest = new XMLHttpRequest();
slideshowRequest.open("GET", "/slide.show/Scripts/Release/SlideShow.js", false);
slideshowRequest.send(null);
eval(slideshowRequest.responseText);

new SlideShow.Control(new SlideShow.XmlConfigProvider({ url: "/slide.show/Samples/Flickr/configuration.xml" }));
</script>
Updates to this post
- Update – 25 Sept 2008: I have cleaned up this post a bit to make it easier to understand.
- Update – 26 Sept 2008: Added information/fix to get it to work on older IE versions.