AD Lookup Control with Perl and JS - Day 1


Recently I needed to do a bit of coding for a project that needed a lookup system into Active Directory, written in Perl. This post explores the excitement (read: pain) I had with this bit of coding. I haven’t touched Perl in a few years, but development is like riding a bike, isn’t it?
Setup
The first problem was that I used to “ride” a Linux bike where Perl is part and parcel of the world. Now I was working on a Windows Server 2008 on my laptop—a different story entirely. So, step one was getting Perl for Windows, and thankfully, my memory (not yet fully destroyed by beer) recalled Active Perl from Active State. It had a Windows version—this takes me back almost a decade to when I last used it, go strong, brain cells! The download and install were painless; it just did its thing.
Next, I needed an IDE to get up and running. I found Perl Express, a free, lightweight IDE for Windows with a built-in debug environment—all I needed. Later, I realized I might have confused it with my small script. Many people recommended Slick Edit instead, as it’s far superior, but it costs money. Since I only needed it for a short while, I stuck with Perl Express. If this were a daily task, though, I’d invest in a proper IDE.
Install NET::LDAP Attempt 1
Next, I needed to figure out how Perl could talk to Active Directory. I assumed LDAP support would be the way, and I found a great series on using NET::LDAP (the link goes to Bundle::NET::LDAP, but I’ll explain that later). You can read part 1 of that series here. I fired up Perl Express and tried the first sample, but it died with the error: “I don’t have NET::LDAP.” So off I went to find out how to install the module via the command line:
perl -MCPAN -e "install Net::LDAP"
However, since it had dependencies, I decided to install the bundle pack instead:
perl -MCPAN -e "install Bundle::Net::LDAP"
This would download, compile, and install everything. The first time I ran the command, it failed—my proxy at work was blocking me. Time to switch to my trusty 3G connection.
Install NET::LDAP Attempt 2
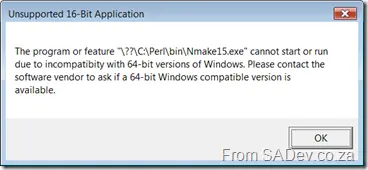
The second attempt failed with a popup error:
 (See full image here)
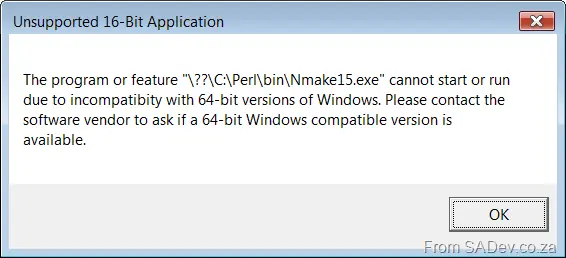
It needed to compile but couldn’t find NMake, so it downloaded an old 16-bit version from Microsoft—which wouldn’t run on 64-bit Windows Server 2008. The internet suggested downloading the Windows SDK, which had a 32-bit version, but it was massive (a few hundred MB). However, I already had Visual Studio installed—shouldn’t it have what I needed?
Thankfully, my search kung fu (I must stop calling skills “Kung Fu”—X-Files is messing with me) led me to a local version of the tool. To use it, I had to run this at the command prompt before the Perl install:
"C:\Program Files (x86)\Microsoft Visual Studio 9.0\VC\vcvarsall.bat"
Install NET::LDAP Attempt 3
Right—attempt number three. This failed due to missing dependencies. You’d think when it asked:
==> Auto-install the 1 optional module(s) from CPAN? [n]
it would actually do that if I said yes. Doesn’t seem so. It appears to be just testing how many times I’d run the tool.
Install NET::LDAP Attempts 4 & 5
Sigh. Now I’d try installing each dependency manually. The commands looked like this:
"C:\Program Files (x86)\Microsoft Visual Studio 9.0\VC\vcvarsall.bat" perl -MCPAN -e "install GSSAPI" perl -MCPAN -e "install IO::Socket::SSL" perl -MCPAN -e "install XML::SAX::Writer" perl -MCPAN -e "install Bundle::Net::LDAP"
It still complained about issues, so I ran each one again—ignoring errors (ignorance is bliss). When prompted, I chose the default “no.” Somehow, even with errors (or maybe I’m just not used to reading these messages), a NET folder with an LDAP.pm file appeared in C:\Perl\site\lib!
Five attempts and it was installed—yeah, just like riding a bike.
Finding My Domain Controller
First, I needed to provide NET::LDAP with my domain controller, which I didn’t know. Instead of logging a call with IT, I decided to figure it out myself. Thankfully, I found a page on Microsoft’s site detailing How Domain Controllers Are Located in Windows, including troubleshooting steps. One method was to manually test via the command line:
nltest /dsgetdc:
This gave me exactly what I needed.
Control Construction Step 1 – Getting the Details
The first part of building my lookup control was querying Active Directory for all users and listing them back. I defined a user as someone with a non-empty surname and a username—no machines or system accounts (yes, SkyNet, I’m looking at you).
The final script looked like this:
#!/usr/bin/perl

use strict;
use Net::LDAP;
use Net::LDAP::Control::Sort;

# Start of user-configurable settings
my $DomainController = "<DOMAIN CONTROLLER>";
my $Username = "<USERNAME@DOMAINNAME>";
my $Password = "<PASSWORD>";
my $BaseOU = "<BASE OU>";
# End of user-configurable settings

# Start of system settings
my $Attributes = "sAMAccountName,sn,displayName";
my $Filter = "(objectCategory=User)";
# End of system settings

print "Attempting to connect to " . $DomainController;

my $ad = Net::LDAP->new($DomainController)
                or die "Could not connect!";

$ad->bind($Username, password => $Password);

my $sort = Net::LDAP::Control::Sort->new(order => "displayName");

my $results = $ad->search(
    base   => $BaseOU,
    filter => $Filter,
    attrs  => $Attributes,
    control => [$sort]
);

if ($results->count == 0) {
    die "No results returned";
} else {
    for (my $counter = 0; $counter < $results->count; $counter++) {
        my $user = $results->entry($counter);
        if (defined($user->get_value("sn")) &&
            length($user->get_value("sn")) > 0 &&
            defined($user->get_value("sAMAccountName"))) {
            print "\nUser Found: " .
                $user->get_value("displayName") .
                " (" . $user->get_value("sAMAccountName") . ")";
        }
    }
}

$ad->unbind;
print "\nDone";
Since I don’t deserve to be called a Perl programmer (I have no skills here), this Perl hacker relied on the internet for help. The sites that helped were:
- How Can I Determine the OU a User Account Belongs To?
- Perl check for nulls
- Perl String Function
- Sorting results
Control Construction Step 2 – The HTML
Since this would be a web page, I wanted a popup when clicking a text box to select a user. To simplify development, I created an HTML file on my desktop and got the JavaScript working in a tightly scoped scenario. This way, I could focus on structure and logic without worrying about bugs from data or Perl code.
Since I’d use JavaScript, I needed a copy of everyone’s (well, at least mine and the guys at End User SharePoint and Microsoft) favorite JS library: jQuery. Next, I browsed jQuery’s plugin section to see if someone had already built what I needed—because, honestly, I’m too busy to reinvent every wheel. Besides, the demos were impressive enough to get me geeked out.
Thankfully, I found Eric Martin’s wonderful Simple Modal plugin, which helped me create a nice mashup of HTML and pop-ups.
You can grab the source code for that mashup by clicking Download (you’ll need 7-Zip to open it).